Table of Contents
ToggleYpres stands out as one of Battlefield 1’s most atmospheric and brutally honest depictions of WW1 trench warfare. Released as part of the Apocalypse DLC in February 2018, this map doesn’t just recreate the Belgian town that saw some of the Great War’s most horrific battles, it forces players into the mud, gas, and chaos that defined the conflict. Whether you’re grinding Conquest or pushing through Operations, Ypres demands a different approach than BF1’s more open maps. The constant artillery, tight trench networks, and environmental hazards punish mindless rushes and reward players who understand positioning, class synergy, and when to hold versus when to advance. This guide breaks down everything from control point priorities to class-specific loadouts, giving you the tactical edge to dominate one of Battlefield 1’s most challenging battlegrounds.
Key Takeaways
- Ypres battlefield demands tight positioning and class discipline, with Assault dominance in trench networks and close-quarters combat that rewards tactical gameplay over raw aim.
- Point C (Central Crater) is the map’s strategic fulcrum—control it plus two flanking objectives to dictate match flow and force enemies into disadvantageous positions.
- Gas masks and grenades are mandatory tools on Ypres; forced ADS denial through gas creates revive opportunities for Medics and breaks enemy defensive formations.
- Squad coordination and smart spawn management (Squad Leader positioning, beacon placement, balanced class composition) matter more than individual K/D ratios for securing consistent victories.
- Understanding map hazards like mud slowdowns, water-filled craters as traps, and barbed wire killzones separates effective players from those who feed enemy tickets through predictable mistakes.
Historical Background: Why Ypres Matters in Battlefield 1
DICE didn’t choose Ypres randomly. The real Ypres Salient witnessed five major battles between 1914 and 1918, including the first large-scale use of poison gas by German forces in April 1915. Over 500,000 casualties occurred in the mud-soaked fields surrounding this Belgian town, making it a symbol of WW1’s senseless attrition.
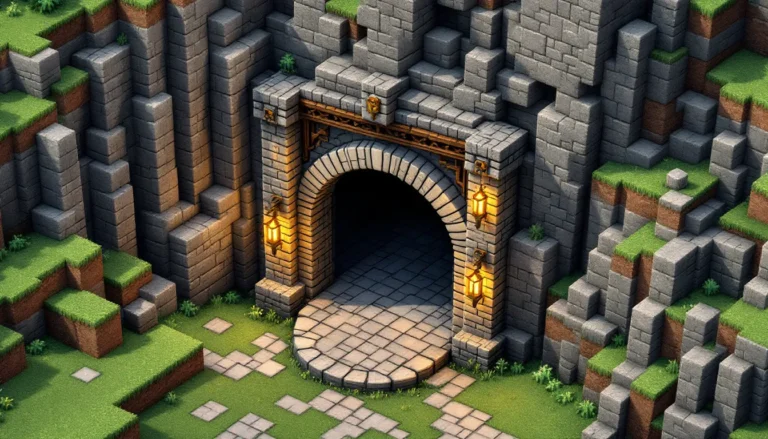
In Battlefield 1, the map pulls visual and gameplay elements from the Third Battle of Ypres (Passchendaele, 1917), which dragged on for three months through October and November. The deep mud, shell craters filled with water, and omnipresent gas clouds aren’t just aesthetic choices, they’re mechanical reflections of what made this battlefield a nightmare.
The map’s design philosophy centers on claustrophobia and environmental lethality. Unlike the sweeping deserts of Sinai or the open fields of St. Quentin Scar, Ypres funnels combat into trench lines, forcing close-quarters engagements where every corner could hide a Hellriegel or Model 10-A Hunter. Understanding this historical context helps explain why the map plays the way it does: slow, methodical, and punishing for players who ignore cover or gas mask discipline.
Map Overview and Layout
Ypres features a linear, three-lane structure compressed into a relatively small playable area compared to other BF1 maps. The British spawn sits on the western edge, while the German spawn anchors the east, with five control points (A through E in Conquest) stretched between them.
Key Zones and Control Points
The control point distribution creates natural choke points and priority targets:
-
Point A (Church Ruins): Western-most flag, heavily favors the British team at match start. The ruined church provides vertical sightlines but minimal hard cover. Scouts often post up in the bell tower remnants, though they’re vulnerable to counter-sniping and artillery.
-
Point B (Trench Network West): The first major trench system. Narrow corridors and sharp corners make this prime Assault territory. Gas grenades are almost mandatory here, expect constant chemical warfare.
-
Point C (Central Crater): The map’s focal point and bloodiest control zone. A massive shell crater dominates the area, with trenches radiating outward. Whoever controls C usually controls the match, but holding it bleeds tickets fast due to constant enemy pressure from multiple angles.
-
Point D (Trench Network East): Mirror of Point B, favoring close-range weapons and explosives. The trenches here connect to the eastern farmhouse ruins, offering slight elevation advantages.
-
Point E (Farm Complex): German-leaning flag with partial building cover. Less contested early game but becomes critical during comebacks or when teams get pushed to their spawn.
Terrain Features and Environmental Hazards
Ypres punishes players who ignore the environment:
Mud and Water: Movement speed drops noticeably when wading through deep mud or flooded craters. Sprint duration shortens, making you easy prey for machine gun nests. Plan routes that minimize time in these zones, especially when retreating under fire.
Gas Clouds: Random gas barrages hit the map periodically, separate from player-deployed grenades. The green-yellow clouds linger for 20-30 seconds, forcing gas mask use and disabling ADS. Audio cues (distant shell whistles) give about three seconds warning, use them.
Artillery Craters: The massive shell holes provide hard cover from snipers but become death traps if enemies get the high ground. Never camp at the bottom of a crater without watching the rim.
Barbed Wire: Scattered throughout no-man’s-land, slowing movement and funneling players into killzones. Support players should pack Repair Tools to clear wire for armor pushes, though most players skip this.
Best Classes for Ypres Battlefield
Class selection on Ypres isn’t flexible, the map’s design heavily favors specific loadouts and roles. Running the wrong class means you’re dead weight to your squad.
Assault Class Strategies
Assault dominates Ypres harder than almost any other BF1 map. The tight trench networks and sub-15-meter engagement ranges play directly into the class’s weapon pool.
Primary weapon priorities:
- MP 18 Trench: Still the most reliable all-rounder for Assault. The hip-fire accuracy and controllable recoil make it perfect for the sudden corner engagements that define Ypres trenches.
- Automatico M1918 Storm: Maximum aggression tool. The absurd fire rate (900 RPM) deletes enemies in close quarters, but the 25-round mag and brutal recoil demand precise positioning.
- Hellriegel 1915 Factory: The meta choice pre-nerf patches, still viable for players who can manage the horizontal recoil. The 60-round drum lets you sweep multiple enemies without reloading, critical when you’re solo-clearing a trench.
Gadget loadout: AT Rocket Gun + Dynamite is standard, but on Ypres consider swapping Dynamite for Anti-Tank Grenades. Trenches limit Dynamite throw angles, while AT grenades bounce around corners and flush out campers.
Playstyle notes: Lead your squad’s trench pushes, but don’t blindly sprint. Check every corner, pre-fire common camping spots, and abuse gas grenades to force enemies off ADS. Your job is point clearance, get in, secure, then hold until Medics and Support arrive.
Medic Class Tactics
Medic becomes MVP-tier on Ypres if played correctly. The constant meat grinder combat generates endless revive opportunities, and good Medics can swing ticket counts by 20+ kills.
Weapon selection:
- Fedorov Avtomat Trench: The controversial choice that basically turns Medic into diet-Assault. Fully automatic with decent hip-fire, letting you compete in CQB while still slinging revives.
- Selbstlader M1916 Optical: For players who prefer staying at medium range. The 26-round mag and low recoil make it perfect for supporting trench pushes from the second line.
- Autoloading 8 .35 Factory: High-risk, high-reward. Two-shot kill potential at close range, but the five-round mag is unforgiving.
Revive discipline: Don’t be a suicide Medic. Ypres’s tight spaces mean the enemy who killed your teammate is probably still aiming at the corpse. Clear the threat first, smoke second, revive third. Prioritize reviving other Medics and Support players, they multiply your squad’s effectiveness.
Gadget choices: Medical Syringe is mandatory (obviously). Second slot should be Smoke Grenades over rifle grenades. Smoke breaks sightlines during objective pushes and creates safe revive zones. On Ypres, smokes are more valuable than the extra damage from rifle grenades.
Support and Scout Positioning
Support and Scout require more nuanced positioning on Ypres compared to other maps.
Support thrives when posted in trench intersections with overlapping fields of fire. The BAR M1918 Storm offers the best balance of mobility and firepower for this map’s ranges. The MG 15 n.A. Suppressive works if you’re holding a single choke point, but the bipod dependency limits flexibility. Always pack Ammo Pouches over crates, pouches resupply on the move, critical in fluid trench fights. Your secondary job is grenade spam: the Crossbow Launcher (HE) lets you rain explosives into enemy-held trenches from relative safety.
Scout struggles on Ypres unless you adjust expectations. This isn’t a map for 300-meter headshots. Iron-sight bolt-actions shine here: the SMLE MKIII Infantry or Russian 1895 Trench let you play aggressively while still one-shotting wounded enemies. Position in secondary trenches 30-40 meters behind the main fight, not in your spawn. Your job is picking off wounded enemies fleeing the front line and counter-sniping the enemy Scouts who are spawn-camping. Gadget-wise, Spot Flares are mandatory, they reveal entire trench sections for your team. Skip the K-Bullets unless you’re specifically hunting the artillery truck hiding in spawn.
Advanced Combat Tactics and Strategies
Winning on Ypres requires more than good aim, it demands understanding the map’s flow and exploiting its mechanics.
Trench Warfare and Close-Quarters Combat
Trench fighting follows predictable patterns once you recognize them. Most trenches on Ypres feature T-junctions or four-way intersections every 15-20 meters. These intersections are control points within control points, whoever owns the junction dictates movement through that trench segment.
Clearing techniques: When pushing into contested trenches, don’t round corners at sprint speed. Approach at walk speed, pre-aim head height, and slice the corner incrementally (“slicing the pie” for players familiar with tactical shooters). Gas grenades are your entry tool, toss one around the corner, wait three seconds, then push while enemies are choking. Many experienced players incorporate techniques seen in pro player crosshair placement guides, keeping their aim at natural head height around corners.
Defensive holds: When defending a trench, position yourself 5-10 meters back from the expected enemy entry point, not right at the corner. This gives you reaction time and lets you see their silhouette before they see you. Rotate positions every 2-3 kills, good enemy players will pre-fire your last known position.
Vertical advantage: The few spots with elevation (crater rims, partial walls) offer massive advantages in trench systems. A player standing on a crater edge can see down into trenches while being harder to spot. Abuse this whenever possible.
Vehicle Gameplay and Tank Strategies
Vehicles on Ypres operate under severe constraints. The mud and craters limit mobility, and the abundance of Assault players makes armor life expectancy short.
Tank loadout priorities:
- Heavy Tank (Flamethrower variant): The only tank that consistently performs well on Ypres. The flamethrower clears trenches in seconds, and the armor can absorb punishment while your infantry follows up.
- Landship (Tank Hunter): Viable if you stay on the flanks and focus on counter-armor. Don’t push into the central crater area, you’ll get swarmed.
- Light Tank: Generally a mistake on this map. The armor is too thin for the Assault density you’ll face.
Movement rules: Never stop moving in a tank, even when firing. Static armor dies to AT Rocket Gun spam within 30 seconds. Circle around the edges of control zones, fire, reposition, fire again. Use infantry as your screen, push only when friendly infantry are already engaging the enemy.
Emergency retreat protocol: If your tank drops below 30 health, retreat immediately to your spawn. Ypres offers almost no safe repair zones outside the spawn areas. Too many tankers try to hold ground at low health and just feed the enemy team points.
Flanking Routes and Movement Patterns
Flanking on Ypres is possible but risky. The map’s narrow design means “flanking” usually means taking a parallel trench rather than a wide sweep.
Northern flank: The trenches north of Points B and C offer a route from the British spawn toward the German side. It’s longer and exposed to sniper fire, but less densely populated. Use this when the central trenches are completely locked down.
Southern flank: Similar mirror route for German-side players. More shell craters provide cover, but the mud slows you down.
No-man’s-land sprints: Going over the top and sprinting across open ground is usually suicide, but it works during heavy fog weather conditions or when artillery smoke obscures the battlefield. Time these moves carefully, wait for environmental cover, not just when you feel like it.
Spawn beacon usage: Scout players should place spawn beacons in the secondary trenches near contested objectives. This lets your squad bypass the main chokepoints and apply pressure from unexpected angles. Don’t place beacons in the front-line trenches, they get discovered and camped within a minute.
Weapon Loadouts and Recommended Gear
Loadout optimization matters more on Ypres than maps with varied engagement ranges. Here’s what works and why.
Primary Weapons for Different Engagement Ranges
Ypres breaks down into three range bands, though close-range dominates 70% of engagements.
0-12 meters (Close): This is where most kills happen.
- Assault: Automatico M1918 Storm, Model 10-A Hunter (if you’re confident with shotguns)
- Medic: Fedorov Avtomat Trench, Autoloading 8 .35 Factory
- Support: BAR M1918 Storm
- Scout: Russian 1895 Trench, SMLE MKIII Infantry
12-35 meters (Medium): Transition zones between trenches and open craters.
- Assault: MP 18 Trench, Ribeyrolles 1918 Factory (if you have the DLC weapon)
- Medic: Selbstlader M1916 Optical, General Liu Rifle Storm
- Support: BAR M1918 Telescopic, Lewis Gun Suppressive
- Scout: SMLE MKIII Marksman, Gewehr M.95 Carbine
35+ meters (Long): Rare on Ypres, mostly spawn-to-spawn sightlines.
- Only Scout class should engage at this range. SMLE MKIII Marksman or any scoped bolt-action.
- Support can suppress with bipoded MGs but shouldn’t expect kills.
Seasoned players often reference optimal weapon configurations when fine-tuning their setups, particularly for sensitivity and attachment choices that complement Battlefield 1’s weapon variant system.
Gadgets and Equipment Choices
Gadget selection makes or breaks your effectiveness on Ypres.
Assault:
- Slot 1: AT Rocket Gun (mandatory for vehicle threats)
- Slot 2: Anti-Tank Grenades or AT Mines (mines work well on the predictable tank routes)
- Grenade: Gas Grenades (forces enemies off ADS, absolutely critical)
Medic:
- Slot 1: Medical Syringe (non-negotiable)
- Slot 2: Medical Crate if you’re playing conservatively, Rifle Grenade (Smoke) if you’re aggressive
- Grenade: Smoke Grenades (create revive opportunities and break sightlines)
Support:
- Slot 1: Ammo Pouch (mobility beats crate on this map)
- Slot 2: Limpet Charge (destroys cover and clears trenches) or Crossbow Launcher (HE)
- Grenade: Gas Grenades or Frag Grenades (both work)
Scout:
- Slot 1: Spot Flares (mandatory, reveals entire control points)
- Slot 2: K-Bullets if enemy armor is active, Tripwire Bomb (HE) for trench defense
- Grenade: Gas Grenades (yes, even Scout benefits from forcing enemies off ADS)
Melee weapon note: The standard Shovel or Club work fine. The kill animations for special melee weapons get you killed mid-animation on Ypres, stick with fast takedowns.
Team Coordination and Squad Play
Solo play on Ypres is frustrating and ineffective. The map’s design punishes lone wolves and rewards coordinated squads.
Objective Priority and Rotation
Not all flags are equal on Ypres. Understanding priority hierarchy prevents your team from wasting manpower on low-value objectives.
Priority tier list:
- Point C (Central Crater): The map’s fulcrum. Teams that hold C force enemies into disadvantageous attacks from both sides. If you’re losing, C is your comeback target.
- Point B or D (whichever is closer to enemy spawn): Holding one of these plus C creates spawn pressure on the enemy team and shortens their reinforcement routes.
- Point A or E (your “home” flag): Usually secure, but needs 1-2 defenders to prevent backcaps. Don’t over-commit defenders here.
- Point E or A (enemy home flag): Low priority unless you’re winning by 200+ tickets and want to spawn trap. Otherwise it’s a ticket drain.
Rotation discipline: When your team holds C + two other flags, resist the urge to push for the fourth and fifth. Overextending breaks your defensive line and lets enemies recapture C while you’re fighting on their spawn. Hold three flags, farm kills, win through tickets.
Squad-level objective calls: Squad Leaders should mark objectives based on current team needs, not just “attack the next closest flag.” If your team controls A, B, and C, mark D for attack. If your team is spread across all five flags with no solid holds, consolidate by marking C or your closest two flags for defense.
Communication and Squad Spawning
Effective squad play on Ypres relies on smart spawn point management and callouts.
Spawn point hierarchy:
- Squad Leader (if positioned well in a secured trench)
- Control point (if enemies aren’t actively contesting it)
- Spawn beacon (if your Scout placed it intelligently)
- Base spawn (last resort, only for vehicle spawns or full wipes)
Squad Leaders should play conservatively on Ypres, not cowardly, but calculated. Your life is worth 4x a normal soldier because you’re a mobile spawn. Don’t lead charges: let your Assault players do that. Position yourself in the second line, 10-15 meters behind the active fight.
Callout priority: Voice chat isn’t common in BF1 public matches, but if you’re running with friends or a clan, focus callouts on:
- Enemy tank locations and health status
- Gas barrages (incoming and location)
- Enemy squad wipes (“B is clear, push now”)
- Flank attempts (“Three enemies northern trench moving to C”)
Skip obvious callouts like “I died” or “enemies at C” when the flag icon is already contested. Information density matters.
Squad composition ideals: A balanced squad for Ypres looks like: 2 Assault, 1 Medic, 1 Support, 1 Scout. The Scout should run iron sights and play mid-range, not snipe from spawn. If your squad is all Assault or all Scout, you’re handicapping yourself, politely suggest class switches or find a better squad.
Common Mistakes to Avoid on Ypres
Ypres punishes bad habits harder than most BF1 maps. Here are the mistakes that separate struggling players from effective ones:
Ignoring gas mask discipline: New players either never equip their mask or leave it on constantly. Both are wrong. Equip your mask when you see the gas indicator or hear yourself coughing, this gives you about two seconds before health damage starts. Remove it the instant you leave the cloud. Fighting with the mask on means you can’t ADS, cutting your effective range by 60%+.
Sprinting everywhere: The worst habit on Ypres. Sprinting around corners gets you killed because you can’t ADS fast enough when you encounter an enemy. Sprint only in non-contested areas or when crossing dangerous open ground. In trenches, use tactical sprint (the brief speed burst before you settle into run speed) or just walk.
Camping at the bottom of craters: The big shell craters look like safe cover, but they’re traps. Enemies on the rim have massive advantage, they see you, you can’t see them until they peek. If you’re in a crater, constantly watch the rim. Better yet, be the one on the rim.
Over-pursuing kills: Chasing a wounded enemy through three trench turns is how you run into his four squadmates and die. Let wounded enemies go if pursuing means leaving your squad or entering unscouted territory. Your K/D doesn’t matter: holding objectives does.
Fighting in the open: Unless weather conditions create visual cover, staying above ground on Ypres is suicide. The map gives you trenches for a reason, use them. The only time to go over the top is when executing a planned flank during distraction windows.
Solo tank pushing: Tank drivers who push into contested objectives without infantry support die within 45 seconds. Assault players will swarm you from three angles with AT gadgets. Always wait for friendly infantry to engage before moving your tank into the fight.
Neglecting secondary weapon: Many players forget they have a pistol. On Ypres, your sidearm matters because reload deaths are common in multi-enemy engagements. When your primary hits empty and an enemy is 5 meters away, switching to your M1911 or Auto Revolver is faster than reloading. Practice the weapon swap, it saves lives.
Predictable movement patterns: Human players develop patterns. If you always enter B through the western trench, good enemies will pre-aim that entrance. Vary your routes every 2-3 spawns. Take the northern trench sometimes, sometimes southern, occasionally over the top if weather allows.
Standing still to heal or resupply: When a Medic or Support player drops pouches/crates, don’t stand stationary in the open to collect them. Keep moving, strafe around them, the pickup radius is generous. Standing still makes you an easy headshot for enemy Scouts or a quick burst for Assault players.
Game Mode-Specific Tips
Ypres plays dramatically differently across game modes. Tactics that work in Conquest fail miserably in Operations.
Conquest Mode Strategies
Conquest on Ypres follows standard ticket bleed mechanics: hold more flags than the enemy and eliminate their soldiers to drain tickets.
Opening strategy (first 3 minutes):
- British team: Secure A immediately, then push hard for B and C. The match is often decided by who captures C first.
- German team: Lock down E, contest D heavily, and send flanking squads toward C through the southern trenches.
Mid-game flow: Once initial flags are captured, the match settles into a fight for C. Whichever team holds C plus two others will likely win unless ticket counts are severely imbalanced. The key is preventing enemy Medics from sustaining their presence at C, focus fire on enemy Medics even before Assault players.
Comeback mechanics: If your team is down by 150+ tickets, don’t try to cap all flags. Focus on C recapture plus one flanking objective (either A or E, whichever the enemy is neglecting). Force the enemy to split their forces, then collapse on C with your full team.
Vehicle utilization: Conquest allows vehicle respawns. If your team’s armor dies early, wait for respawn rather than immediately spawning infantry. A well-timed Heavy Tank push when the enemy doesn’t expect it can flip two flags in 60 seconds.
Endgame (sub-50 tickets): When tickets drop below 50 for either team, shift from objective play to pure elimination. If you’re winning, play conservatively and avoid feeding kills. If you’re losing, make aggressive trades, even 1-for-1 kills help when you’re behind on flags because you’re bleeding tickets faster anyway.
Operations and Rush Mode Tactics
Operations and Rush fundamentally change Ypres dynamics because attackers have limited reinforcements and must capture objectives sequentially.
Attacker priorities (Operations/Rush):
- First wave aggression: Use your initial battalion’s tickets aggressively. Don’t conserve lives, push hard and fast before defenders get entrenched. The first 5 minutes determine the match.
- Behemoth coordination: If you unlock the airship, coordinate infantry pushes to happen when the Behemoth is overhead providing fire support. Too many teams ignore their Behemoth and waste the advantage.
- Smoke saturation: Attackers should run at least 3-4 Medics with smoke grenades. Create smoke walls across no-man’s-land to enable pushes. One player smoking isn’t enough, you need overlapping smoke to block defender sightlines.
- Objective priorities: In multi-flag sectors, identify which objective has weaker defensive positions and focus your entire team there. Don’t split 50/50 on both flags, 80/20 splits work better.
Defender tactics (Operations/Rush):
- Defense in depth: Don’t pack everyone on the front-line trenches. Position 60% forward, 40% in reserve 20-30 meters back. When attackers break the first line, your reserves counter-attack and retake positions.
- Elite kit control: The map spawns elite kits (Flame Trooper, Tank Hunter, etc.). Defenders should control these spawns and use them to anchor defensive positions. A Flame Trooper in a trench intersection can delay attackers for 90+ seconds if played correctly.
- Gas denial: Defenders should spam gas grenades on the objectives continuously. Force attackers to fight with masks on, negating their ADS advantage. Communicate with your team to stagger gas throws so the objectives stay gassed constantly.
- Medic chains: Defenders need strong Medic presence. Set up revive chains where Medics stay slightly back and immediately revive fallen defenders. This multiplies your effective reinforcements and drains attacker tickets through repeated kills on the same players.
- Fallback timing: Know when to abandon a sector. If attackers take one objective and have 400+ tickets remaining, don’t feed kills trying to retake it. Fall back to the next sector and set up proper defenses there.
The strategies that work in high-level competitive play, similar to those discussed on platforms like HLTV team tactics analysis, apply here: coordination beats individual skill, economy management (in this case, ticket conservation) matters as much as fragging, and map control dictates engagement outcomes.
Conclusion
Ypres isn’t a map you casually dominate without understanding its rhythm. The trench networks, environmental hazards, and constant close-quarters combat create a fundamentally different experience than Battlefield 1’s more open maps. Success here comes from class discipline, positioning awareness, and squad coordination rather than raw gun skill.
The players who thrive on Ypres are the ones who embrace the map’s constraints instead of fighting against them. They understand that holding three flags beats chasing five, that gas grenades are mandatory equipment rather than optional, and that your squad’s spawn point management often matters more than individual K/D ratios.
Whether you’re grinding Conquest, pushing through Operations, or defending in Rush, the core principles remain: control the trenches, prioritize Point C, support your armor with infantry screens, and adjust your loadout to favor close-range dominance. Master these fundamentals, and you’ll turn Ypres from a frustrating meat grinder into a map where you consistently top the scoreboard while actually helping your team win. The mud, gas, and chaos aren’t bugs, they’re features that separate players who adapt from those who don’t.