Table of Contents
ToggleIf you’ve been searching for a Washita Battlefield map in the Battlefield franchise, you’re about to hit a dead end, but there’s a reason why this topic keeps surfacing, and understanding it will save you hours of confusion. The historical Battle of Washita, a controversial 1868 engagement between the U.S. 7th Cavalry and Cheyenne forces, has never been officially adapted as a playable map in any Battlefield title through early 2026. But, the persistent searches, community discussions, and modding experiments suggest a hunger for period-specific, unconventional warfare maps that break from the typical World War or modern combat settings. This guide addresses what players are actually looking for: whether a Washita-themed map exists, why it doesn’t (yet), and how the mechanics and strategies from similar historical Battlefield maps could theoretically apply if DICE ever greenlights a 19th-century expansion or if modders deliver a community version first.
Key Takeaways
- No official Washita Battlefield map exists in any Battlefield title through early 2026, despite persistent player interest in 19th-century warfare settings.
- A theoretical Washita Battlefield map would feature asymmetric gameplay with cavalry charges on open plains versus defenders holding a village encampment, requiring fundamentally different tactical approaches.
- Successful attacking strategies depend on coordinated cavalry rushes, flanking maneuvers, and team-based objective pushes, while defenders must leverage terrain, anti-cavalry countermeasures, and overlapping fields of fire.
- Cavalry units would dominate open terrain if included, but skilled defenders can counter mounted threats through coordinated rifle fire, mines, and strategic building placement.
- The Washita Battlefield setting remains unlikely for official development due to historical sensitivity, though community modders could theoretically create versions using Battlefield 1’s engine.
- Competitive play on a Washita-style map would prioritize spawn beacon management, squad coordination through voice comms, and map control over raw individual gunfight skills.
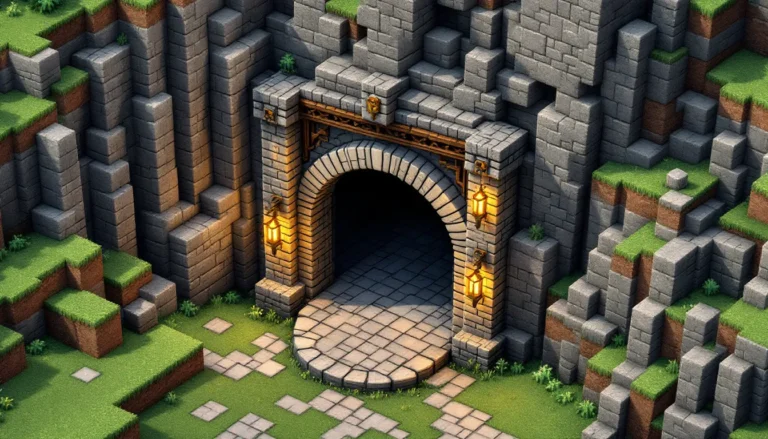
What Is the Washita Battlefield Map?
Historical Context and Setting
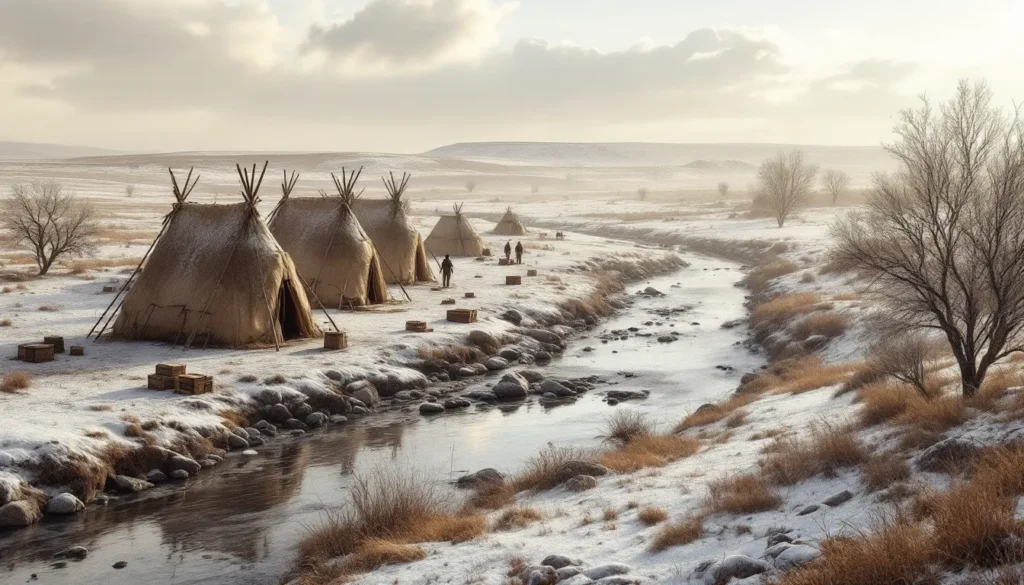
The Battle of Washita occurred on November 27, 1868, in present-day western Oklahoma. Lieutenant Colonel George Armstrong Custer led the 7th Cavalry in a dawn assault on a Cheyenne encampment along the Washita River, resulting in the deaths of Chief Black Kettle and dozens of others, along with the destruction of the village. The engagement remains deeply controversial due to the high number of non-combatant casualties and its place in the broader Indian Wars narrative.
From a game design perspective, a Washita map would require asymmetric gameplay: mounted cavalry units with superior mobility and firepower versus a defending force fighting from a village with limited resources but intimate knowledge of terrain. The winter setting, snow-covered plains, frozen riverbanks, and scattered lodges, would create a visually distinct environment unlike anything in the current Battlefield rotation. Environmental audio cues, limited sight lines due to morning fog, and the psychological pressure of a surprise dawn raid would all factor into authenticity.
Game Version and Availability
As of March 2026, no official Battlefield title includes a Washita Battlefield map. This applies to Battlefield 1 (which covered World War I), Battlefield V (World War II), Battlefield 2042, and all prior entries in the franchise. DICE has historically avoided the Indian Wars period, likely due to the sensitivity of depicting colonial violence against Indigenous peoples in a multiplayer shooter format.
That said, the Battlefield modding community has experimented with 19th-century warfare. Battlefield 1918, a popular mod for Battlefield 1942, proved that earlier conflicts could work within the Frostbite engine’s predecessor. If a Washita map ever surfaces, it’ll likely emerge as a community-created mod for Battlefield 1 or a standalone project using older Refractor engines. No confirmed leaks or official statements from EA/DICE suggest a Washita map is in development for Battlefield 2042’s live service or any upcoming title.
Map Layout and Key Locations
Northern Sector: River Valley and Encampment Zones
In a theoretical Washita map, the northern sector would anchor around the Washita River itself, a shallow, partially frozen waterway that splits the battlefield. The river would function similarly to the Somme’s trenches in Battlefield 1: a natural barrier that channels movement and creates chokepoints.
The Cheyenne encampment would occupy the northern bank, featuring a cluster of lodges, livestock pens, and supply caches. These structures would offer soft cover, destructible but temporarily effective against small-arms fire. Attackers spawning from the south would face open ground before reaching the river, making the initial crossing a high-risk, high-reward gamble. Defenders holding this sector could use the lodges for ambush positions, forcing cavalry to dismount or risk getting funneled into killzones.
Objective A (in a Conquest-style mode) would likely sit here: “Village Center” or “Black Kettle’s Lodge.” Capturing it would require clearing multiple buildings in close quarters, negating the attacking team’s ranged advantages.
Central Plains and Open Battlegrounds
The central plains would dominate the map’s largest area, wide-open grassland with minimal cover, designed to favor cavalry charges and long-range rifle engagements. This is where the historical 7th Cavalry’s shock tactics would shine in gameplay terms: fast-moving mounted units flanking slower infantry or overwhelming isolated defenders.
Sparse cover elements, rock outcroppings, shallow gullies, lone trees, would be critical. A skilled scout player could lock down sightlines from these positions, picking off cavalry as they cross. The openness also punishes solo players: team coordination becomes essential to avoid getting run down.
Objective B (“Central Crossing” or “Open Ground”) would sit mid-map, likely near a dried creek bed or wagon remains. Holding it would be nearly impossible without active patrol and counter-sniping, creating a constant tug-of-war.
Southern Ridge and Elevated Positions
The southern ridge would serve as the attacking team’s spawn and staging area, a low ridgeline offering elevation advantage over the plains and encampment. Historical accounts describe Custer’s forces approaching from higher ground, and in Battlefield terms, this translates to ideal Scout/Recon nesting spots.
Players spawning here would have roughly 200-300 meters of open terrain to cross before engaging. The ridge itself would feature sparse vegetation and rock formations, enough to support 2-3 sniper positions without overcrowding. Defensive teams pushing south could attempt to capture Objective C (“Ridge Overlook”) to flip spawns and pressure the attackers from behind, a high-skill, high-reward counter-strategy.
The elevation difference wouldn’t be extreme (maybe 10-15 meters), but enough to impact bullet drop and provide a psychological edge. Attackers caught on the ridge with enemies below would face exposure from multiple angles.
Objective Points and Control Zones
A Conquest variant would likely feature five objectives:
- A (Village Center): Close-quarters, defender advantage
- B (Central Crossing): Contested, no inherent advantage
- C (Ridge Overlook): Attacker advantage, long-range dominance
- D (Eastern Flank): Secondary encampment area, light cover
- E (Western Approach): Forested area (if historically plausible), alternative route
Breakthrough or Operations mode would work better thematically: attackers must overrun the encampment in waves, defenders hold for survival. Ticket counts would be asymmetric, attackers get more lives to simulate numerical superiority, defenders get defensive structures and terrain advantages.
Best Strategies for Attacking Teams
Cavalry Rush Tactics and Early Game Aggression
The attacking team’s greatest asset would be cavalry units, assuming the map includes them, similar to Battlefield 1’s horse mechanics. A coordinated cavalry rush in the opening 60 seconds could overwhelm the encampment before defenders establish firing lines.
Key tactics:
- Lance/Saber charges: Mounted melee would one-hit-kill dismounted players, making early aggression devastating
- Mounted rifle fire: Cavalry units could fire from horseback with reduced accuracy, suppressing defenders while closing distance
- Dismount timing: Smart players would dismount before entering the village, using horses as mobile spawn points rather than exposing them to concentrated fire
The historical 7th Cavalry split into multiple columns to surround the village. In gameplay terms, this means attacking squads should never funnel into a single approach. If three squads rush the northern river crossing while one flanks east and another holds the ridge, defenders can’t cover all angles simultaneously.
Flanking Routes and Surprise Approaches
The map’s open design would make traditional flanking harder than in urban Battlefield maps, but terrain features would offer concealment. A shallow ravine running northeast-southwest (based on the Washita’s geography) could allow assault players to crawl within 50 meters of the encampment undetected.
Smoke grenades become critical here. Popping smoke at the river crossing creates confusion, masking cavalry movements and infantry advances. Defenders relying on long-range sight lines lose their advantage when visibility drops to 10 meters.
Another option: if the map includes a wooded eastern section (the Washita region had scattered timber), a slow, patient flanking squad could bypass the main defenses entirely. This works best in Breakthrough mode, where defenders must anchor on specific objectives and can’t freely roam.
Coordinating Team Pushes on Objectives
Disorganized attacks on a Washita-style map would be massacres. The open terrain punishes lone wolves, and defenders with even basic coordination can mow down scattered infantry.
Effective team pushes require:
- Spawn beacon placement: Scouts dropping beacons near Objective A after the initial rush
- Suppression fire: Support players laying down covering fire from the ridge while assault squads advance
- Timed explosives: If lodges are destructible, coordinating explosive spam (dynamite, grenade spam) to collapse cover and flush out defenders
Many competitive FPS players emphasize voice comms for asymmetric maps, without callouts, attackers waste tickets on piecemeal assaults that defenders easily repel.
Defensive Strategies and Hold Positions
Setting Up Defensive Perimeters
Defenders would start with a structural advantage, the encampment itself, but holding it requires smart positioning before the initial cavalry wave hits. Pre-match setup (first 30 seconds) determines survival:
- Support players: Lay mines at the three most likely river crossings: cavalry charging through triggers instant kills
- Assault players: Position inside lodges facing south, pre-aiming doors and windows
- Scouts: Take elevated positions on lodge roofs (if climbable) or the northern treeline for overwatch
The historical defenders were caught by surprise, but in gameplay terms, the defending team would have a brief prep window. Using it to build overlapping fields of fire, each lodge covering approaches to two others, creates a web that’s hard to penetrate without coordinated pushes.
Using Terrain for Cover and Ambush
Once the encampment falls under heavy assault, falling back to terrain features becomes the play. The riverbank itself offers natural defilade: prone players behind the 1-2 meter embankment are invisible to attackers on the southern plains.
Ambush tactics work best in the transition zones between objectives. If attackers capture Objective A and push toward B, a defending squad hiding in the dried creek bed can flank from behind, hitting spawn waves before they rejoin the main force.
Smoke grenades work both ways. Defenders popping smoke in the village create chaos that negates the attackers’ numerical advantage. In close-quarters fog, a defender with a trench knife or hatchet (if period-appropriate melee is included) can rack up kills against disoriented enemies.
Counter-Cavalry and Anti-Rush Tactics
Cavalry would be the attacker’s most potent tool, so countering mounted units is priority one. Historical tactics involved shooting horses, controversial but mechanically straightforward in Battlefield.
Effective counters:
- Landmines: One mine kills horse and rider instantly
- Concentrated rifle fire: 3-4 defenders focusing one cavalry unit drops it in seconds
- Trip wires: If the map includes gadgets like Battlefield 1’s trip wire HE, placing them at choke points stops charges cold
- Pike formations (if available): Melee weapons with extended reach could counter lance charges, though this is speculative
The key is not panicking. New players see cavalry charging and scatter: experienced defenders hold formation and focus fire. A cavalry unit is only scary when it isolates single targets.
Optimal Class Loadouts for Washita Battlefield
Scout Class: Long-Range and Reconnaissance
Scout would dominate open-map play, but weapon choice matters. Assuming period-accurate rifles (Springfield Model 1866, Sharps carbines), you’re looking at high bullet drop and slow cycling compared to Battlefield 1’s sweet-spot mechanics.
Optimal loadout (attacking):
- Primary: Springfield Carbine (mobility over range on horseback)
- Sidearm: Colt Single Action Army
- Gadgets: Spotting flare, K-bullets (if cavalry is “vehicle” class)
- Melee: Saber (mounted combat bonus)
Optimal loadout (defending):
- Primary: Long-range Sharps rifle (for counter-sniping from encampment)
- Gadgets: Tripwire, spawn beacon
- Melee: Knife (faster draw in CQC lodge fights)
The Scout’s flare becomes critical for defenders: revealing the attacking team’s staging area on the ridge lets your team pre-aim spawns.
Assault Class: Close-Quarters and Objective Play
Assault would be the objective workhorse, clearing lodges and contesting points. Without automatic weapons (assuming historical accuracy), you’d rely on lever-action rifles and shotguns with limited capacity.
Optimal loadout:
- Primary: Lever-action repeater (Winchester 1866, ~12-round capacity)
- Gadgets: Dynamite (for destroying cover), anti-tank grenade (if cavalry counts as “armor”)
- Sidearm: Revolver
- Melee: Tomahawk (faster swing speed, thematic)
The dynamite becomes a lodge-clearing tool: toss into a structure, collapse the roof, force defenders into the open. It’s brutal but effective.
Support and Medic Roles
Support would struggle on this map due to the lack of stationary defense points, but ammo resupply for a rifle-heavy meta is always valuable. Medic becomes the most team-dependent role, reviving in open terrain is a death sentence, but inside the encampment’s tight spaces, a good medic can swing objective holds.
Support loadout:
- Primary: Repeating rifle with high capacity
- Gadgets: Ammo crate, limpet charge (structure destruction)
- Melee: Shovel (utilitarian)
Medic loadout:
- Primary: Carbine or pistol-caliber rifle (self-defense while reviving)
- Gadgets: Med pouch (fast heal), syringe
- Smoke grenades: Essential for reviving in contested zones
Vehicle and Mounted Combat Tips
Cavalry Units: Mobility and Shock Tactics
If Washita Battlefield includes cavalry as a “vehicle” class (like Battlefield 1’s horse system), mastering mounted combat would separate good players from great ones. Cavalry isn’t just transport, it’s a mobile weapon platform with unique mechanics.
Mounted combat tips:
- Charge angles: Approach enemies at 45-degree angles rather than head-on: gives you a wider swing arc and makes you harder to hit
- Dismount discipline: Always dismount for objective captures: mounted players can’t interact with flags
- Health management: Horses have separate health pools, if your mount is below 50%, retreat and regenerate rather than pushing
- Saber vs. lance: Lance has longer reach (ideal for initial charges), saber swings faster (better for multi-kills in clusters)
The historical 7th Cavalry used a “charge-and-reload” tactic: fire pistols while charging, switch to melee on impact, retreat to reload. In Battlefield terms, this translates to using your sidearm at 20-30 meters, swapping to melee for the kill, then riding out before enemies regroup.
Countering Mounted Units
Defenders need hard counters, not panic. Cavalry is only OP if you let it be.
Counter tactics:
- Stay grouped: Cavalry can’t charge a tight 4-man squad without taking lethal damage
- Aim for the horse: In most Battlefield vehicle systems, destroying the mount kills or dismounts the rider
- Use buildings: Cavalry can’t enter structures: retreat inside to negate their advantage
- Landmines at chokes: Place mines at the three most-used river crossings: a single Support player can neutralize half the enemy cavalry in the first minute
- Bayonet charges: If you’re caught in the open, a bayonet charge (if the mechanic exists) can interrupt a cavalry melee swing
The biggest mistake defenders make is running away, movement triggers the cavalry player’s chase instinct, and you’ll get run down. Stand your ground, aim center mass on the horse, and fire in controlled bursts.
Common Mistakes to Avoid
Even experienced Battlefield players would make predictable errors on a map like Washita due to its unconventional design. Here’s what kills your team’s momentum:
Going lone wolf in open terrain. This isn’t Metro or Locker, there’s no safe solo flank. Cavalry or long-range scouts will delete you before you reach cover. Always move with at least one other player.
Ignoring the ridge. Attackers often forget to leave a few scouts on Objective C to counter-snipe and suppress defenders. If defenders push south and cap the ridge, your team loses its spawn advantage and momentum collapses.
Overcommitting to the village. Once inside the encampment, attackers tend to get tunnel vision, chasing kills instead of capping objectives. Meanwhile, defenders respawn and retake flags behind you. Cap the point, then establish a perimeter, kills come second.
Wasting cavalry on point defense. Mounted units are offense tools, not static defenders. If you’re sitting on a captured flag on horseback, you’re wasting the class. Cavalry should roam, flank, and disrupt, never anchor.
Not adapting to ticket bleed. In Conquest, if your team holds 3/5 flags, you don’t need to push for the remaining two and risk giving up your secure positions. Let the ticket bleed do the work. Too many squads overextend chasing a fourth flag and lose two in the process.
Poor spawn beacon placement. Scouts dropping beacons in the middle of the open plains create death traps. Place them in cover near contested objectives, behind the riverbank, inside captured lodges, or in the eastern ravine.
Neglecting comms. This map would require more coordination than most Battlefield offerings. Without callouts for cavalry flanks, sniper positions, or objective status, your team is playing with a handicap. Use pings if you’re not on mic.
Advanced Tips for Competitive Play
Communication and Team Coordination
In competitive or organized play, Washita Battlefield would reward pre-planned strategies and role assignments. Pub matches favor individual skill, but coordinated teams would dominate through superior macro play.
Pre-match assignments:
- Alpha Squad (Cavalry): Early rush on Objective A, dismount and hold until reinforcements arrive
- Bravo Squad (Assault/Medic): Follow 15 seconds behind Alpha, focus on revives and lodge clearing
- Charlie Squad (Scout/Support): Hold the ridge, provide overwatch and spawn beacon for fallback
- Delta Squad (Flex): React to enemy movements, counter flank attempts or reinforce weak points
Callouts need to be specific: “Two cavalry east side river crossing” is better than “Enemies over there.” The map’s open design means vague callouts waste critical seconds.
Mid-match adjustments: If the enemy team stacks defenders on Objective A, don’t grind into it, redirect two squads to B and C, force them to split their defense. Competitive Battlefield is about forcing bad decisions, not brute-forcing through chokepoints.
Map Control and Spawn Management
Spawn management would be the difference between 300-point blowouts and close matches. Controlling spawn vectors means the enemy team can’t establish momentum.
For attackers: Once you cap Objective A, immediately push one squad to D or E (flanking objectives). This forces defenders into a two-front fight and prevents them from massing on your main push. If you hold A + C (village + ridge), you control both spawn areas and can pincer any counterattack.
For defenders: Losing the village isn’t the end, if you hold B and can retake A, attackers get caught between your forward spawn and the ridge. The key is never letting attackers hold three contiguous flags. Break their line, and their spawn wave gets scattered.
Spawn beacon meta: In high-level play, the team that maintains 3+ active spawn beacons in smart positions (near but not on objectives) wins. Beacons let you contest multiple points simultaneously without relying on flag spawns. Destroying enemy beacons becomes a priority, always check common spots (behind rocks, in gullies, on rooftops).
Conclusion
A Washita Battlefield map doesn’t exist in any official Battlefield title as of early 2026, but the strategic principles outlined here apply to similar asymmetric, open-terrain maps in the franchise. If DICE ever ventures into 19th-century warfare, or if a ambitious mod team takes on the project, the gameplay would hinge on mobility, terrain mastery, and coordination over raw gunfights. The historical controversy surrounding the Battle of Washita makes official inclusion unlikely, but the mechanical possibilities remain compelling: cavalry charges, long-range rifle duels, and village sieges offer a change of pace from the typical Battlefield formula. Until then, players craving this style of combat can look to Battlefield 1’s cavalry-heavy maps like Sinai Desert or the asymmetric Operations mode for the closest approximation.