Table of Contents
ToggleEvery Minecraft player knows the feeling: you’ve carved out a massive underground network, stockpiled diamonds, and set up efficient mining operations. But when you return to the surface, your mine entrance is just a sad, two-block hole in the ground with maybe a torch slapped on the side. It’s functional, sure, but it doesn’t exactly scream “epic base.”
A well-designed mine entrance isn’t just eye candy. It marks territory, prevents mob invasions, organizes your mining operations, and honestly? It makes the whole experience feel more immersive. Whether you’re building a medieval kingdom, a futuristic compound, or just trying to keep creepers out of your mineshafts, the entrance sets the tone for everything below.
This guide covers over 30 mine entrance designs ranging from simple wooden frames to complex redstone-powered hidden doors. Players will find practical blueprints, material lists, and build tips that work across Java and Bedrock editions in 2026. Time to turn that ugly hole into something worth showing off.
Key Takeaways
- A well-designed mine entrance serves critical functions beyond aesthetics, including mob deterrence, organization of mining operations, and marking territory on multiplayer servers.
- Minecraft mine entrance designs range from simple wooden frames costing minimal materials to complex redstone-powered hidden doors, with options suitable for every game stage and building skill level.
- Proper lighting at light level 1 or higher, combined with doors, trapdoors, or transparent blocks like glass and leaves, prevents hostile mob spawns near entrance areas.
- Integration with your base design—matching materials, colors, and architectural style—transforms a mine entrance from an afterthought into a cohesive part of your overall structure.
- Always plan your underground mining layout and strategy before building the entrance, as attempting to fit an entrance around an already-built mine leads to awkward proportions and wasted materials.
- Advanced redstone mechanics like automated piston doors, password-protected systems, and pressure-plate activation add impressive functionality while maintaining hidden or seamless aesthetics for competitive multiplayer servers.
Why Your Mine Entrance Matters More Than You Think
Most players treat mine entrances as an afterthought, something to throw together in thirty seconds so they can get back to strip mining. But that entrance serves multiple critical functions that directly impact gameplay.
First, it’s a spawn-point deterrent. A poorly lit or open entrance invites mobs right into your base perimeter. Zombies, skeletons, and creepers don’t need much encouragement to wander into dark holes. A proper entrance with lighting, doors, or trapdoors creates a barrier that keeps hostiles outside where they belong.
Second, organization matters when you’re running multiple mining operations. Players often have separate tunnels for different depths, biomes, or resource types. A well-designed entrance can incorporate signage, color-coded pathways, or dedicated minecart lines that make navigation instant instead of confusing.
Third, there’s the visibility factor. In multiplayer servers or Realms, a distinctive mine entrance marks your claim. It’s a landmark that helps you navigate back from distant explorations and signals to other players that this area is developed and maintained.
Finally, immersion hits different when your build actually looks like a mining operation instead of random terrain damage. The same effort players put into crafting impressive builds should extend underground. A castle needs a proper gate. A modern facility needs an industrial entrance. The mine entrance bridges your surface aesthetic with your underground infrastructure.
Essential Planning Before Building Your Mine Entrance
Choosing the Perfect Location for Your Mine
Location determines everything about how functional your entrance will be. Ideally, it should sit within visual range of your main base or storage area. Running back and forth between a distant mine and your crafting stations gets old fast, especially when inventory management is constant in Minecraft.
Terrain matters too. Building into a hillside or mountain face provides natural structure and reduces material costs. Players can incorporate existing stone formations, caves, or cliff faces into the design rather than building everything from scratch. Flat ground works fine but requires more blocks and planning to create visual interest.
Consider your mining strategy as well. If you’re planning a massive branch mine at Y-level -59 for diamonds, the entrance needs to accommodate a long descent, either a spiral staircase, multiple ladder sections, or a minecart rail system. For surface-level cave exploration, a simpler entrance with quick access makes more sense.
Proximity to mob spawners also factors in. Building an entrance too close to a spawner dungeon means constant combat every time you want to mine. Scout the area thoroughly or check your F3 debug screen (Java) to identify nearby hostile structures before committing to a location.
Materials and Resources You’ll Need
Material requirements vary wildly depending on design complexity, but most mine entrances share common elements. For basic functional builds, players need:
- Stone variants (cobblestone, stone bricks, andesite): 3-5 stacks for structural walls and floors
- Wood planks and logs: 2-3 stacks for framing, supports, and decorative beams
- Doors or trapdoors: Iron doors provide better security: wooden ones match aesthetic builds
- Torches or lanterns: At least one stack for proper lighting coverage
- Glass or glass panes: Half a stack for windows or decorative accents
Medieval and fantasy builds require additional materials like stone bricks, mossy variants, iron bars, and potentially nether brick for darker themes. Modern industrial designs lean heavily on concrete, smooth stone, iron blocks, and redstone lamps.
For advanced redstone entrances, players should gather:
- Sticky pistons (4-12 depending on door size)
- Redstone dust (2-3 stacks)
- Redstone torches and repeaters (10-15)
- Pressure plates, buttons, or levers for activation
- Slime blocks if building complex piston mechanisms
It’s worth collecting materials before starting construction. Nothing kills momentum like realizing you’re three stone bricks short of finishing an archway and having to run back to your furnaces. Experienced builders using creative building approaches often prepare a dedicated shulker box or chest with entrance materials near the build site.
Simple and Functional Mine Entrance Designs
Classic Wooden Frame Entrance
The wooden frame entrance is the starter home of mine entrances, simple, cheap, and effective. This design works for early-game players who haven’t stockpiled fancy materials yet but still want something better than a raw hole.
Build a rectangular frame using oak or spruce logs, four blocks wide and five blocks tall. Place the frame around your mine opening, then fill the top and sides with wooden planks, leaving the center open for passage. Add a wooden door at ground level and line the interior walls with torches every three blocks to prevent spawns.
For extra detail, place wooden stairs upside-down along the top edge to create an overhang, and add trapdoors on either side of the entrance as shutters. Total material cost runs about two stacks of logs and one stack of planks, achievable within the first hour of a new survival world.
Stone Archway with Torch Lighting
The stone archway bumps up the durability and aesthetic without requiring rare resources. This design suits players transitioning from wood to stone-based builds and works particularly well when mining into hillsides.
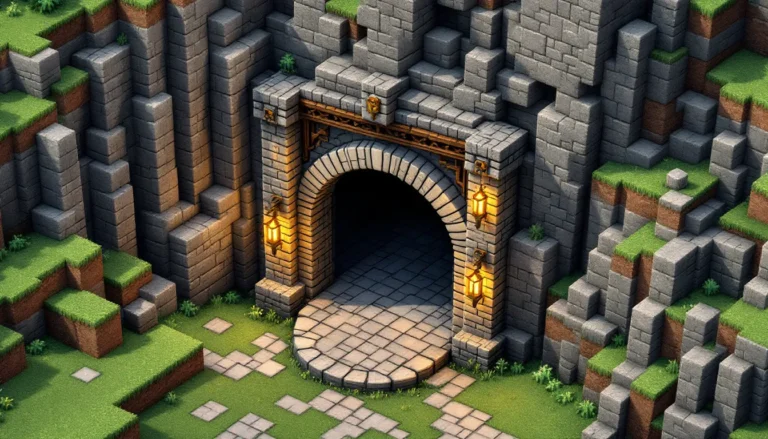
Create an arch using stone bricks or cobblestone, five blocks wide at the base and seven blocks tall at the peak. Use stairs and slabs to smooth the curve at the top, giving it that classic rounded archway look. Place stone brick walls or iron bars as side railings leading down into the mine shaft.
Torches mounted on the archway pillars provide functional lighting, but players can upgrade to lanterns hanging from chains for better ambiance. Adding a stone brick staircase immediately inside the entrance, rather than a ladder or drop shaft, makes the entrance feel more refined. According to recent building guides, archway entrances remain one of the most popular designs for their balance of simplicity and visual appeal.
Trapdoor and Ladder Quick Access Design
For players prioritizing speed over style, the trapdoor entrance offers instant access to deep mining levels. This ultra-compact design works especially well for secondary mine entrances or hidden shafts near main bases.
Dig a 2×2 shaft straight down to your target mining level. Install a ladder on one wall for the entire descent. At the surface, place a trapdoor over the opening, iron trapdoors prevent mobs from opening it, while spruce trapdoors blend into most terrain.
Build a small platform or hut around the trapdoor to mark the location and add minimal decoration. Players can incorporate this design into existing buildings like barns, storage sheds, or even under staircases. The entire build costs fewer than 20 blocks and takes about five minutes to complete, yet provides fully functional access to any depth.
Medieval and Fantasy-Themed Mine Entrances
Castle-Style Mining Outpost
The castle mining outpost turns a simple entrance into a fortified structure that looks like it could house a garrison. This design works beautifully for players building medieval towns, kingdoms, or roleplay servers.
Construct two stone brick towers flanking the mine entrance, each 8-12 blocks tall and 3×3 blocks wide. Connect them at the top with a wall section featuring crenellations (the classic castle tooth pattern made with full blocks and gaps). The mine entrance itself sits between the towers as a recessed archway, four blocks wide and six blocks tall.
Add oak or dark oak doors reinforced with iron bars on either side. Place torches in wall-mounted positions or switch to lanterns for a warmer medieval atmosphere. Banners displaying faction colors or custom designs can hang from the towers. Some players incorporate a working portcullis using fence gates or iron bars controlled by redstone.
The towers themselves can serve functional purposes, one might house a storage room for mining supplies, while the other contains an enchanting table or smithing station. This transforms the entrance from pure decoration into an actual outpost with gameplay utility.
Dwarven Mountain Gate Design
Inspired by fantasy fiction, the dwarven gate builds directly into a mountain face and emphasizes grand scale and stone craftsmanship. This is the entrance for players who want to feel like they’re walking into Moria every time they go mining.
Find or create a mountain with a vertical cliff face. Carve out a massive archway, at least 7 blocks wide and 12 blocks tall. Frame it with stone brick or polished andesite pillars, and add decorative elements like stone brick stairs creating geometric patterns along the arch.
The key to selling the dwarven aesthetic is symmetry and runes. Use banners to create runic symbols on either side of the entrance, or spell out words using strategically placed blocks. Inside the arch, build a grand hallway descending into the mountain with stone columns every 8-10 blocks supporting the ceiling.
Lighting should feel dramatic rather than practical. Instead of torches everywhere, use lanterns placed at specific intervals with shadows between them. Some players add lava falls behind iron bars as decorative light sources. The goal is to make the entrance feel ancient and carved by master builders rather than slapped together in an afternoon. Players looking to expand their medieval building repertoire often start with signature entrances like this before tackling full castle complexes.
Dungeon-Inspired Entrance with Iron Bars
For players wanting a darker, more ominous vibe, the dungeon entrance leans into prison and fortress aesthetics. This works particularly well for mines leading to hostile mob farms, nether portal rooms, or hardcore survival bases.
Build the frame from stone bricks mixed with cracked and mossy variants for an aged appearance. Create a rectangular entrance five blocks wide and seven blocks tall. Instead of doors, use iron bars across the opening with a gap in the middle that players can walk through (iron bars don’t block movement but create visual barriers).
Add chains hanging from the ceiling, cobwebs in the corners, and skeleton skulls mounted on walls using armor stands with carved pumpkins. Place soul lanterns instead of regular torches to give the entrance an eerie blue glow. Stone brick walls with iron bars set into them can line the descending tunnel.
This design intentionally looks uninviting, which serves a practical purpose on servers, other players are less likely to explore an entrance that looks like it leads to a trap-filled death maze. Whether it actually does is up to the builder.
Modern and Industrial Mine Entrance Ideas
Concrete Bunker-Style Entrance
The concrete bunker entrance brings modern military aesthetics to Minecraft mining operations. This design requires access to concrete powder and dye but creates a distinct industrial look that stands out from traditional builds.
Use smooth concrete (gray or white work best) to construct a rectangular bunker entrance, 6 blocks wide and 4 blocks tall. Create thick walls (2-3 blocks deep) to emphasize the fortified nature. Install iron doors at the entrance with stone buttons or pressure plates for activation.
Add glass panes as narrow observation windows on either side of the door. Place redstone lamps inside the entrance tunnel for clean, modern lighting. Some builders incorporate concrete powder barriers or terracotta stripes as warning markings, similar to industrial sites.
For extra detail, use upside-down stairs to create ventilation grates, and add levers or buttons on the exterior that don’t actually connect to anything, they just sell the industrial control panel aesthetic. The whole build feels like a government facility or military mining operation rather than a medieval fantasy.
Redstone-Powered Automated Door System
Automated doors transform entrances from static structures into interactive machinery. This design requires intermediate redstone knowledge but creates impressive functionality.
The simplest automated system uses pressure plates connected to iron doors. Place a pressure plate on each side of the door (inside and outside), wire them to the door with redstone dust, and the doors open automatically when players approach. For double doors, both doors need redstone connections to open simultaneously.
More advanced systems use hidden weighted pressure plates buried under carpet or grass blocks, creating entrances that appear to open on approach without visible triggers. Daylight sensors can automate doors to close at night, adding security against mob invasions.
Players wanting maximum security can build password systems using specific walking patterns or item throws, though these require more complex redstone circuits. As demonstrated in many advanced building tutorials, automated systems add functionality that justifies the extra effort in material and planning.
Industrial Minecart Station Design
For players running extensive underground rail networks, a proper minecart station entrance makes transportation seamless. This design combines aesthetics with functional rail logistics.
Build a platform using stone bricks or concrete as the station floor, at least 10 blocks wide and 15 blocks long. Create a covered roof using glass and iron bars to let light in while maintaining the industrial look. Designate specific rail lines with signs indicating destinations: “Diamond Level,” “Branch Mine A,” “Mob Farm,” etc.
Install powered rails at the station entrance with a lever or button activation system. Add chest storage along the walls for quick inventory management before descending. Hoppers under the arrival platform can automatically collect items from incoming minecarts.
Lighting should be bright and functional, use redstone lamps or sea lanterns on the ceiling. Item frames displaying maps of your rail network can hang on walls, turning the station into a proper transit hub rather than just an entrance. This design scales beautifully: players can start with a single rail line and expand as their underground operations grow.
Natural and Camouflaged Mine Entrances
Hidden Cave Entrance with Foliage
The hidden cave entrance is perfect for players who want their mining operations concealed from other players or simply prefer organic-looking builds that blend into the landscape.
Find a natural cave opening or create one by carving into a hillside with irregular shapes rather than perfect rectangles. Leave the stone formation as close to natural as possible. Plant oak leaves, vines, and tall grass around the entrance to obscure the opening partially. Azalea bushes and flowering azaleas work particularly well for adding color while maintaining camouflage.
Inside, avoid obvious player-made structures near the entrance. Use natural stone rather than cobblestone or bricks for the first several blocks. Place lighting sources like sea pickles, glow berries, or even hidden redstone lamps behind foliage rather than torches on walls.
The goal is for the entrance to look like just another cave unless someone investigates closely. On servers, this design provides genuine concealment for valuable mining operations. In single-player, it creates a more immersive survival experience where bases feel discovered rather than constructed.
Waterfall Secret Entrance
The waterfall entrance combines natural beauty with functional concealment. This design requires water source blocks and decent terrain but creates one of the most visually impressive entrances in Minecraft.
Locate or create a cliff face at least 10 blocks tall. Build your mine entrance into the cliff, then create a water flow from the top that falls directly in front of the opening. The water curtain obscures the entrance from outside view while remaining passable for players.
Use signs, soul sand, or magma blocks to control water flow precisely. Place signs on the wall behind where water flows to prevent it from flooding the mine interior. Players can walk through the falling water with minimal slowdown, just enough to make the entrance feel deliberate.
Add moss blocks, glow lichen, or dripleaf plants around the waterfall to enhance the natural aesthetic. Lighting can come from glow berries hidden in the water or sea lanterns placed strategically behind the flow. Some players extend this concept by building entire bases behind waterfalls, accessible only through specific entry points. The entrance itself remains functional while looking like a natural terrain feature rather than player construction.
Hillside Blended Design
The hillside blend technique creates entrances that match surrounding terrain so well they’re nearly invisible until you’re standing right in front of them. This appeals to players who want hidden bases without complex redstone mechanisms.
Start by selecting a hillside with natural vegetation. Dig your entrance at ground level but maintain the hill’s shape above and around it. Use the same block types as the surrounding terrain, if the hill is grass-covered dirt and stone, your entrance structure uses those materials. If it’s in a mesa biome, match the terracotta layers.
Replace blocks methodically so the entrance appears to be a natural cave formation rather than excavated tunnel. Maintain irregular shapes rather than perfect symmetry. Add stone buttons, trapdoors, or fence gates that match the terrain color, spruce in taiga biomes, dark oak in dark forests, etc.
Vegetation placement sells the illusion. Plant grass, flowers, and saplings right up to the entrance edge. Some players use leaf blocks to create overhanging foliage that partially conceals the opening from aerial views. The result looks like a crack in the hillside rather than a built structure, making it ideal for players employing stealth building strategies on competitive servers.
Advanced Redstone Mine Entrance Mechanics
Piston Door Hidden Entrance Tutorial
Piston doors represent the pinnacle of hidden entrances, seamless walls that slide open to reveal passages, then close behind you without a trace. This tutorial covers a basic 2×2 piston door, achievable with moderate redstone understanding.
Components needed:
- 4 sticky pistons
- 4 blocks for the door (stone, stone bricks, or matching terrain)
- Redstone dust (about 20)
- 4 redstone torches
- 2 redstone repeaters
- Activation mechanism (lever, button, or pressure plate)
Build steps:
- Dig a 3-block-deep pit where your door will be, 4 blocks wide
- Place sticky pistons facing the center opening from all four sides
- Attach your chosen door blocks to each piston
- Wire redstone from your activation point to each piston, using torches and repeaters to create the circuit
- Test activation, all four blocks should retract simultaneously, creating a 2×2 opening
- Hide the redstone wiring underground or in walls
- Camouflage the activation mechanism
The challenge is making everything flush and hidden. Players can build false walls around the door area or integrate it into existing structures like bookshelves, waterfalls, or paintings. More advanced variations include 3×3 doors, vertical doors, or doors that open into the floor rather than walls.
Multiple tutorials on platforms like YouTube and gaming sites offer circuit variations with different timing and aesthetics, but the basic principle remains consistent: sticky pistons push blocks in and out to create temporary openings.
Password-Protected Entry Systems
Password systems take security to another level by requiring specific input sequences before granting access. These range from simple button combinations to complex item-based mechanisms.
Button combination lock:
Create a wall with 4-6 buttons. Wire specific buttons to a redstone line that powers your door, while others trigger dummy circuits or traps. The “password” is pressing the correct buttons in sequence. Use repeaters with different delay settings to require specific timing between presses.
Item frame password:
Place item frames containing specific items (e.g., compass, clock, map). Behind each frame, install a comparator that only outputs signal when the item is rotated to a specific position. Only the correct combination of rotations powers the door.
Dropper sequence system:
Build a dropper that requires players to insert specific items in a particular order. Hoppers below detect items via comparators. Only when the correct sequence completes does the system output a signal that opens the entrance.
These systems deter casual trespassers on servers while creating impressive showpieces. The main drawback is players occasionally forget their own passwords, requiring emergency access hatches or reset mechanisms. For solo survival, they’re overkill but undeniably cool.
Lighting and Decoration Tips for Mine Entrances
Best Lighting Options for Ambiance and Safety
Lighting serves dual purposes in mine entrances: preventing mob spawns and creating atmosphere. Different light sources create different moods while maintaining the same functional light level.
Torches remain the cheapest and most accessible option. They fit medieval and rustic builds perfectly but feel out of place in modern or futuristic designs. Placing torches every 3-4 blocks prevents spawns while maintaining medieval tavern vibes.
Lanterns provide the same light level as torches (15) but with a more refined appearance. They can hang from ceilings using chains or sit on fence posts for classic street lamp aesthetics. Lanterns suit almost any build style from medieval to modern.
Redstone lamps offer clean, bright lighting perfect for industrial or modern entrances. They require redstone power sources but create uniform illumination without the flicker of torches. Hidden behind glass or within walls, they produce ambient lighting that feels high-tech.
Sea lanterns and glowstone emit strong light without requiring activation. Sea lanterns fit underwater or ocean-themed builds, while glowstone works for nether-inspired entrances. Both blocks can be hidden behind glass for indirect lighting effects.
Glow lichen and glow berries provide subtle, natural lighting ideal for cave entrances or organic builds. They don’t prevent spawns alone but combine beautifully with other light sources for layered effects.
Lava creates dramatic lighting with inherent danger. Behind iron bars or glass, lava flows add intense orange ambiance perfect for threatening or industrial atmospheres. Just keep it away from flammable materials.
Layering different light sources creates depth. Use bright lanterns at the entrance threshold, then transition to dimmer glow lichen deeper inside for atmospheric descent. Players mastering advanced lighting techniques often combine multiple sources to achieve specific moods while maintaining spawn-proof light levels.
Adding Signs, Banners, and Custom Details
Decorative elements transform functional entrances into memorable builds. Small details separate generic mine holes from signature locations.
Signs provide practical information and character. Place signs indicating depth levels (“Y-15: Diamond Layer”), resource types (“Iron Branch Mine”), or warnings (“Beware Cave Spiders”). For roleplaying servers, signs can display lore, mining company names, or humorous messages.
Banners add color and personalization. Create custom banner designs using looms and dyes, then hang them flanking the entrance or inside the tunnel. Faction symbols, warning patterns, or decorative motifs make entrances instantly recognizable.
Item frames can display mining tools, maps, or specific items that indicate the mine’s purpose. A frame holding a diamond pickaxe signals a serious operation, while one with a bucket suggests water-related mining or cave exploration.
Armor stands positioned as guards, workers, or statues add life to otherwise empty entrances. Equip them with mining gear, give them tools, or pose them as sentries watching the entrance.
Flower pots, trapdoors, and buttons serve as small decorative accents. Flower pots with dead bushes create a barren mining camp feel, while ones with flowers suggest a cared-for entrance. Trapdoors function as shutters, tables, or decorative panels. Buttons become rivets, knobs, or control panels.
Carpets and paths define walking areas and add color. Use stone brick slabs to create defined pathways or colored concrete powder patterns for modern industrial looks. Carpets in medieval builds can simulate worn floor runners.
The goal isn’t to clutter the entrance with every decoration available but to select elements that reinforce your chosen theme and add personality without impeding functionality.
Safety Features Every Mine Entrance Should Have
Preventing Mob Spawns Near Your Entrance
Mob spawns near entrances create constant combat interruptions and pose genuine threats when players are focused on inventory management or entering with low health.
First, achieve light level 1 or higher across the entire entrance area. Hostile mobs require light level 0 to spawn, so even minimal lighting prevents spawns. Use torches, lanterns, or any light source every few blocks. Don’t forget corners, overhangs, or shadowed areas that might drop below the threshold.
Second, place transparent blocks where decoration allows. Mobs can’t spawn on glass, leaves, slabs (when placed on the upper half), or carpets. Strategic placement creates spawn-proof areas while maintaining aesthetics. Carpets over floor sections, glass panels as windows, or leaf blocks as decorative foliage all prevent spawns.
Third, consider using slabs for entire floor sections. Half-slabs (when bottom-placed) allow mob spawns, but top-placed slabs prevent them entirely. Swapping out normal floors for top-slab floors eliminates spawn chances without changing appearance much.
Fourth, install doors or fence gates at the entrance perimeter. Closed doors prevent most mobs from entering even if they spawn nearby. Iron doors offer better security since zombies and vindicators can break wooden doors on Hard difficulty.
Fifth, create a perimeter wall or fence around the entrance area. This establishes a buffer zone where players can safely transition between surface and underground. Light the perimeter thoroughly and consider using fences since mobs don’t pathfind over them easily.
Some players maintain a kill zone just inside the entrance, an area with views to a mob spawning area connected to a grinder or kill chamber. This turns the entrance into a functional mob farm while keeping the approach clear.
Emergency Storage and Tool Stations
Emergency resources at the entrance prevent deaths from running out of tools, food, or torches mid-mining session. This is basic survival strategy that too many players skip.
Place a chest immediately inside the entrance (but not visible from outside on servers) stocked with:
- Backup pickaxes (at least one iron, preferably diamond)
- Food (2-3 stacks of bread, cooked meat, or golden carrots)
- Torches (1-2 stacks)
- Spare weapons (sword and shield)
- Healing items (potions if available, otherwise more food)
- Water bucket (for lava emergencies)
- Blocks (cobblestone or dirt for pillar escapes)
Some players add crafting tables and furnaces to the entrance area, creating a mini-outpost where they can smelt ore immediately and craft tools without returning to main base. This significantly improves mining efficiency on extended sessions.
Ender chests at entrances provide access to most valuable items while keeping them secure. Players can deposit diamonds, rare ores, or important equipment into the ender chest network immediately after finding them, preventing loss if they die deeper in the mines.
Bed placement near entrances sets spawn points, so death doesn’t mean respawning at world spawn or a distant bed. But, players should be cautious about placing beds underground or near the entrance if there’s any chance of mobs reaching them, waking up surrounded by hostiles creates new problems. A small room off the main entrance with proper lighting and a door serves as a safe bed chamber. This approach aligns with broader survival planning strategies that emphasize preparation over reaction.
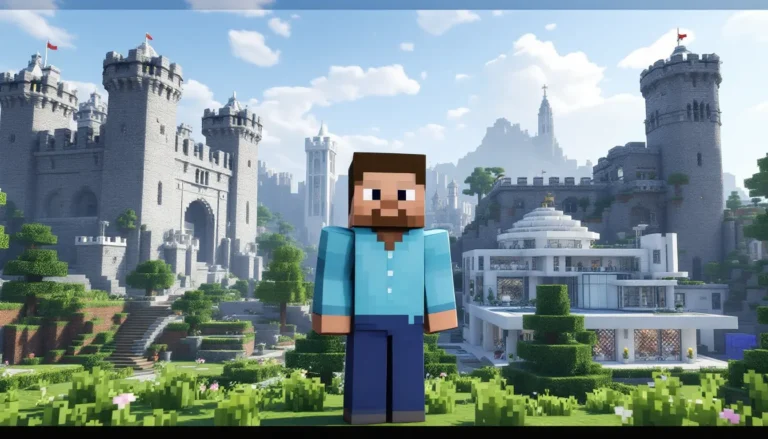
Integrating Your Mine Entrance with Your Base Design
The mine entrance should feel like an intentional part of your base rather than an afterthought tacked onto the side. Integration starts during initial base planning, not after everything else is built.
For centralized bases where all functional buildings cluster together, position the mine entrance as a focal point or anchoring structure. A castle might place the mine entrance as a gate tower that’s part of the perimeter wall. A modern compound could integrate the entrance as a bunker structure central to the facility layout.
Architectural consistency matters enormously. If the base uses stone bricks and oak wood, the mine entrance needs those same materials. A random concrete bunker entrance jutting from a medieval village breaks immersion and looks amateurish. Match color palettes, block types, and building techniques between structures.
Pathways and roads should connect directly from the entrance to other base structures. Cobblestone paths, gravel roads, or concrete walkways create clear traffic flow. Players shouldn’t have to navigate around obstacles or cut through buildings to reach the mine from storage areas.
Scaling also affects integration. A massive ornate entrance next to a tiny starter shack looks ridiculous. The entrance should be proportional to the base’s overall size and complexity. Starter bases get simple entrances: massive megabases earn grand architectural statements.
Functional connections enhance integration beyond aesthetics. Minecart rails running from the mine entrance directly to storage systems create physical links. Redstone wiring from the entrance to base lighting systems or automated farms shows interconnected infrastructure. Water or lava channels from entrance to various base sections demonstrate planned engineering.
Some players build bases specifically around mine entrances, designing surface structures that complement and enhance the mining operations below. A smithing hall directly above the mine entrance, for instance, creates logical workflow where ores come up from below and immediately enter processing.
Thematic cohesion ties everything together. Fantasy bases might treat the mine as a sacred excavation with religious symbols and ceremonial elements. Industrial bases frame it as a corporate extraction operation with signage, safety markings, and utilitarian design. Horror-themed bases could use ominous mine entrances as centerpiece threats. Whatever theme drives the base design should extend into the mine entrance.
Common Mine Entrance Building Mistakes to Avoid
The biggest mistake is building the entrance before planning the mine itself. Players create elaborate entrances, then realize their mine shaft descends at the wrong angle, exits in an awkward location, or doesn’t accommodate their preferred mining method. Always plan the underground layout first, then design the entrance around it.
Poor lighting ranks second. Entrances with inadequate lighting become mob spawn points that ambush players during vulnerable moments like inventory management or mid-conversation in multiplayer. Every entrance needs light level 1 minimum across the entire area, including above overhangs and behind decorative elements.
Scale misjudgment creates awkward proportions. Entrances that are too small feel cramped and difficult to navigate, especially when carrying full inventories or running from mobs. Entrances that are too large dwarf surrounding structures and waste materials. A good rule: the entrance should be 3-5 blocks wide minimum for comfortable passage, scaling up for grand designs.
Ignoring terrain leads to fighting against the landscape instead of working with it. Players who force specific designs onto inappropriate terrain end up with massive excavation projects or weird floating elements. Building a bunker entrance into a mountain makes no sense: building a dwarven gate into flat plains looks equally wrong. Let terrain guide design choices.
Material inefficiency happens when players use expensive or rare blocks for purely decorative entrance elements. Quartz, diamonds, or netherite blocks look cool but represent absurd material waste for a functional structure. Save rare materials for areas where they actually matter, like beacon pyramids or enchantment setups.
Forgetting functionality for aesthetics creates beautiful but impractical entrances. Doors that don’t close properly, lighting that doesn’t prevent spawns, or pathways that require jumping create friction every time players use the entrance. Function comes first: aesthetics enhance functional designs but shouldn’t compromise them.
Weather vulnerability affects certain designs. Wooden entrances near lava or open flames risk accidental burns. Unprotected entrances in cold biomes accumulate snow and ice that blocks pathways. Entrances in desert or beach biomes might get buried by falling sand if not properly structured. Consider environmental factors during design.
Lack of expansion planning creates problems when players want to add new tunnels, rail lines, or mining levels. An entrance built for a single shaft can’t accommodate three separate branches without major reconstruction. Leave room for growth or build modular designs that accept additions.
Server security oversights include placing valuable storage right at entrance points where raiders can access them, or building elaborate hidden entrances without protecting the actual mine below. A hidden piston door means nothing if the mine shaft is visible from another angle or accessible through cave systems. On competitive servers, demonstrated by many multiplayer guides, entrance security is only one layer of base defense.
Conclusion
Mine entrances define the player’s relationship with one of Minecraft’s core activities. A well-designed entrance makes every mining session start and end with intention rather than just dropping into a hole and hoping for the best.
The designs covered here range from five-minute builds to multi-hour projects, from functional starter entrances to elaborate redstone contraptions. Players should choose based on their current game stage, available resources, and personal aesthetic preferences. There’s no objectively “best” mine entrance, only the one that fits the specific base, playstyle, and creative vision.
The real skill comes from blending form and function. An entrance that looks incredible but gets players killed by mob spawns fails its purpose. An entrance that’s perfectly safe but looks like a raw hole in the ground misses the opportunity to showcase creativity. The sweet spot balances aesthetics, security, functionality, and integration with the broader base design.
For players just starting, begin with simple wooden frames or stone archways. As resource accumulation and building skills develop, experiment with medieval gates, modern bunkers, or complex redstone systems. The mine entrance can evolve alongside the base itself, starting basic and growing more sophisticated over time.
Minecraft in 2026 continues to offer endless creative possibilities, and mine entrances remain one of the most practical applications of that creativity. Whether it’s a hidden waterfall entrance on a PvP server or a grand dwarven gate on a creative realm, the entrance signals that what lies below matters enough to warrant a proper introduction.