Table of Contents
ToggleMinecraft’s blocky aesthetic has defined sandbox gaming for over a decade, but ray tracing changed everything. What started as a technical showcase in 2020 has evolved into one of the most visually transformative experiences in gaming. Minecraft RTX doesn’t just add pretty reflections, it fundamentally rewrites how light, shadow, and color behave in the game’s voxel world.
In 2026, ray tracing support for Minecraft has matured considerably. NVIDIA’s implementation now supports the latest RTX 50-series cards, DLSS 3.5, and an expanding library of community-created worlds that showcase what’s possible when path tracing meets creative building. But getting it running smoothly requires more than just powerful hardware. This guide covers everything: what RTX actually does to Minecraft’s rendering engine, system requirements, setup instructions, performance optimization, troubleshooting, and how to build or download content that makes full use of the technology.
Key Takeaways
- Minecraft RTX transforms the game’s lighting through path tracing, which dynamically simulates how light bounces, reflects, and scatters using physically accurate physics instead of pre-baked shadows.
- An NVIDIA GeForce RTX GPU from the 20-series or newer is required to enable Minecraft RTX on Bedrock Edition for Windows, with RTX 4070 or better recommended for 1440p gaming.
- DLSS 3.5 technology is essential for Minecraft RTX performance, delivering 35-70% FPS increases depending on quality mode and enabling playable frame rates on mid-range hardware.
- Physically Based Rendering (PBR) texture packs are mandatory to unlock Minecraft RTX’s visual potential, adding normal maps, roughness, metallic, and emissive properties that make materials interact realistically with light.
- Building with RTX lighting in mind requires strategic placement of emissive blocks like glowstone and sea lanterns as focal points, layering light sources at different heights, and exploiting reflections for dramatic visual impact.
- Ray Tracing Render Distance is the most impactful performance setting; lowering it from 8 to 4-6 chunks can double FPS while beyond-distance terrain still renders with standard lighting.
What Is Minecraft RTX?
Minecraft RTX is the ray tracing implementation exclusive to the Minecraft Bedrock Edition for Windows. It’s powered by NVIDIA’s RTX technology and uses path tracing, a form of ray tracing that simulates how light bounces, refracts, and scatters in real-world physics.
Unlike traditional rasterization (which fakes lighting with pre-baked shadows and reflection maps), path tracing calculates each light ray’s journey through the scene. When sunlight hits a block, the engine tracks how that light reflects onto nearby surfaces, passes through glass, or gets absorbed by darker materials. The result is lighting that behaves like the real world: torches cast warm, falloff-based glows: water reflects the sky and surrounding terrain: and shadows soften naturally based on distance from the light source.
Minecraft RTX was first introduced in April 2020 as a beta feature for RTX 20-series cards. By 2026, it supports RTX 20, 30, 40, and 50-series GPUs, with DLSS 3.5 integration for performance gains and improved ray reconstruction. It remains exclusive to Bedrock Edition on Windows 10/11, Java Edition does not support official RTX, though third-party shader mods attempt similar effects with varying success.
Understanding Ray Tracing Technology
Ray tracing simulates light by casting rays from the camera into the scene and calculating how they interact with surfaces. Traditional rendering (rasterization) projects 3D geometry onto a 2D screen and applies pre-calculated lighting. Ray tracing, by contrast, computes lighting per pixel in real time.
Path tracing is ray tracing’s most advanced form. Instead of shooting a single ray per pixel, it traces multiple rays that bounce several times, accumulating color and brightness as they interact with materials. This produces global illumination: indirect light that bounces off walls, tinted reflections from colored blocks, and soft shadows that blend naturally.
In Minecraft RTX, path tracing replaces the game’s entire lighting pipeline. The engine no longer uses light levels (0-15) to determine brightness. Instead, every light source, sun, moon, torches, lava, glowstone, emits photons that the GPU traces through the scene. It’s computationally expensive, which is why RTX cards with dedicated ray tracing cores are required.
How Minecraft RTX Differs from Standard Minecraft
Standard Minecraft (both Java and Bedrock without RTX) uses a rasterized renderer with baked lighting. Light levels are calculated per block, shadows are hard-edged and binary, and reflections don’t exist. Water is opaque or uses a simple scrolling texture. Glass doesn’t refract light.
With RTX enabled, the differences are immediate:
- Lighting is dynamic and physically accurate. Torches create spheres of warm light that dim naturally. Sunlight changes color temperature from dawn to dusk.
- Shadows are soft and react to light distance. A block close to a light source casts a sharp shadow: farther away, it softens and fades.
- Reflections appear on smooth surfaces. Polished stone, water, and glass reflect the environment in real time.
- Materials respond to light properties. Metals reflect more: rough surfaces diffuse light: emissive blocks (glowstone, redstone lamps) cast colored light into the scene.
- Global illumination creates color bounce. A red carpet near a white wall tints the wall pink. Sunlight filtering through stained glass projects colored light onto floors.
These changes don’t just make Minecraft prettier, they change how players build and design spaces. Lighting becomes a design tool, not just a mechanic to prevent mob spawns.
System Requirements for Minecraft RTX
Minecraft RTX is more demanding than standard Minecraft by an order of magnitude. Path tracing requires significant GPU horsepower, even at 1080p. Here’s what’s needed to run it.
Minimum and Recommended Hardware Specifications
Minimum Specifications (30-40 FPS at 1080p, DLSS Performance mode):
- GPU: NVIDIA GeForce RTX 2060 (6GB VRAM minimum)
- CPU: Intel Core i5-8400 or AMD Ryzen 5 2600
- RAM: 8GB (16GB recommended)
- OS: Windows 10 64-bit (version 1909 or higher) or Windows 11
- Storage: 4GB available space (SSD recommended for faster world loading)
- Minecraft Version: Bedrock Edition (available via Microsoft Store or Xbox App)
Recommended Specifications (60+ FPS at 1440p, DLSS Balanced mode):
- GPU: NVIDIA GeForce RTX 4070 or higher
- CPU: Intel Core i7-10700K or AMD Ryzen 7 5800X
- RAM: 16GB
- OS: Windows 11 64-bit
- Storage: SSD with 10GB+ free space
For 4K gameplay with RTX enabled, an RTX 4080 or RTX 4090 is recommended. Even with DLSS, 4K path tracing pushes current hardware hard. Players using RTX 50-series cards (released in early 2026) report smoother performance at higher resolutions due to improved ray tracing cores and DLSS 3.5 integration.
Compatible Graphics Cards and Drivers
Minecraft RTX requires an NVIDIA GeForce RTX GPU from the 20-series or newer. AMD and Intel GPUs do not support Minecraft RTX, as the implementation is built on NVIDIA’s proprietary RTX API and DXR (DirectX Raytracing) extensions.
Supported GPU families:
- RTX 20-series: 2060, 2060 Super, 2070, 2070 Super, 2080, 2080 Super, 2080 Ti
- RTX 30-series: 3050, 3060, 3060 Ti, 3070, 3070 Ti, 3080, 3080 Ti, 3090, 3090 Ti
- RTX 40-series: 4060, 4060 Ti, 4070, 4070 Super, 4070 Ti, 4070 Ti Super, 4080, 4080 Super, 4090
- RTX 50-series: 5060, 5070, 5070 Ti, 5080, 5090 (as of 2026)
Driver requirements:
NVIDIA Game Ready drivers version 551.23 or newer are required as of March 2026. Older drivers may cause stability issues or prevent RTX from activating. Players should download the latest drivers directly from NVIDIA’s website or via GeForce Experience.
Graphics card performance has been extensively tested across multiple hardware configurations by enthusiasts and independent reviewers. It’s worth noting that the RTX 4060 (with 8GB VRAM) can struggle in complex, high-detail worlds, VRAM usage often exceeds 6GB with PBR texture packs enabled.
How to Enable RTX in Minecraft
Enabling RTX in Minecraft isn’t as simple as flipping a switch. It requires the correct version of the game, a compatible world or resource pack, and proper in-game settings.
Installing Minecraft for Windows
Minecraft RTX only works with Minecraft Bedrock Edition for Windows. Java Edition does not support official RTX (though shader mods like Continuum RT and SEUS PTGI attempt similar effects).
If you already own Minecraft: Java Edition, you likely received a free copy of Bedrock Edition when Microsoft unified the versions in 2022. To install:
- Open the Microsoft Store or Xbox App on Windows 10/11.
- Search for “Minecraft for Windows” (not “Minecraft: Java Edition”).
- Download and install. If you own Java Edition, it should show as available in your library.
- Launch the game and sign in with your Microsoft account.
Bedrock Edition supports cross-play with consoles and mobile, but RTX features are Windows-exclusive. Console and mobile players joining an RTX world will see the standard renderer.
Activating Ray Tracing in Game Settings
Once Bedrock Edition is installed and updated, follow these steps:
- Download an RTX-compatible world or resource pack. RTX doesn’t activate in standard Minecraft worlds, you need content specifically designed with PBR textures and emissive materials. More on this in the “Best RTX Worlds” section below.
- Load the RTX world or apply the resource pack in-game. Go to Settings > Global Resources and activate the RTX pack, or load a pre-made RTX world from the Marketplace or a downloaded file.
- Enable ray tracing in Video Settings:
- Open Settings > Video.
- Scroll down to the Ray Tracing section.
- Toggle Ray Tracing to On.
- Adjust Ray Tracing Render Distance (4-12 chunks: higher values tank performance).
- Enable DLSS (if available). Under the same Video Settings, toggle DLSS to On and select a quality mode: Performance, Balanced, or Quality. DLSS reconstructs the image at a lower internal resolution and upscales it, significantly boosting FPS.
- Apply and restart if prompted.
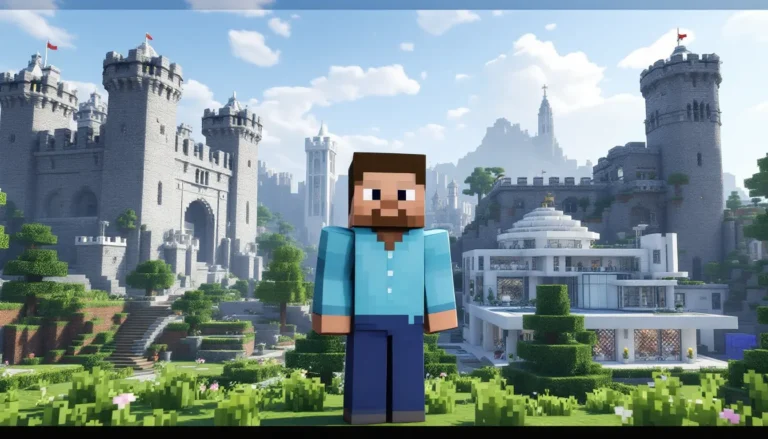
If the Ray Tracing toggle is grayed out, it usually means the world or resource pack doesn’t include RTX support, or your GPU drivers need updating. Some players creating ambitious Minecraft builds have found that enabling RTX transforms how lighting interacts with large-scale constructions.
Visual Enhancements with Minecraft RTX
The visual upgrades RTX brings to Minecraft are best understood by breaking down the individual rendering techniques it introduces.
Realistic Lighting and Shadows
In standard Minecraft, light propagates in discrete levels (0-15) and shadows are either present or absent. RTX replaces this with physically-based light transport. Every light source, sun, moon, torches, lanterns, glowstone, lava, even the enchantment table glow, emits light that the engine traces through the scene.
This creates lighting that feels natural:
- Torches emit warm, orange light that fades with distance. The falloff is smooth and realistic, not the harsh circular boundary of vanilla Minecraft.
- Sunlight shifts in color temperature throughout the day. Morning light is cool and blue: midday is neutral white: sunset is warm and amber.
- Colored light sources (like redstone lamps or sea lanterns) tint nearby surfaces. A blue sea lantern casts blue light onto surrounding blocks.
- Shadows are soft and distance-aware. A block close to a torch casts a sharp shadow: farther away, the shadow edge blurs. This mimics how real-world shadows behave based on the size and distance of the light source (penumbra).
Emissive blocks are key to RTX’s lighting. In standard Minecraft, glowstone is just a bright texture. With RTX, it emits actual light into the scene. Builders can create glowing patterns, illuminate rooms with embedded emissive blocks, or design light-based art installations.
Reflections and Water Effects
One of the most striking changes is how reflective surfaces behave. Smooth materials like polished stone, glass, and water now reflect the environment in real time.
Water is where RTX shines. In vanilla Minecraft, water is either opaque or uses a simple texture. With RTX:
- Water surfaces reflect the sky, terrain, and structures above them.
- Underwater light caustics (the dancing patterns of refracted light) appear on the sea floor.
- Transparency and refraction allow players to see through water with realistic distortion.
- The color of water is affected by depth and surrounding light. Shallow water in sunlight is clear and blue-green: deep ocean water is dark and absorbs light.
Glass and ice refract light, bending rays as they pass through. Stained glass filters light and projects colored patterns onto surfaces below, finally making stained glass windows functionally beautiful, not just decorative.
Metallic and polished blocks (like polished blackstone, iron blocks, or diamond blocks with PBR textures) produce sharp, mirror-like reflections. A polished floor reflects the ceiling: a diamond block reflects light sources and nearby players.
Physically Based Rendering (PBR) Textures
PBR textures are the secret ingredient that makes RTX work. Standard Minecraft textures are single images (albedo/diffuse maps). PBR textures are multi-layered:
- Albedo (color map): The base color of the block.
- Normal map: Adds surface detail (bumps, grooves) without additional geometry.
- Roughness map: Defines how smooth or matte a surface is. Low roughness = shiny: high roughness = diffuse.
- Metallic map: Marks which parts of the texture behave like metal (reflective, conductive).
- Emissive map: Specifies which pixels emit light (glowstone, redstone lamps, etc.).
- Height/Displacement map (optional): Adds depth via parallax occlusion.
When an RTX resource pack is applied, these maps tell the path tracing engine how each block should interact with light. Stone looks rough and absorbs light. Polished stone is smooth and reflective. Glowstone emits warm light. Diamond ore sparkles with metallic highlights.
Without PBR textures, RTX still functions, but the lighting is less dramatic because the engine has no material information to work with. Most RTX showcases use custom PBR packs that completely overhaul Minecraft’s visual identity.
Best RTX Worlds and Resource Packs to Download
RTX content comes in two forms: pre-built worlds (complete maps designed to showcase RTX lighting) and resource packs (texture sets that make your own worlds RTX-compatible).
Official NVIDIA RTX Showcase Worlds
NVIDIA partnered with Minecraft creators to produce a series of official RTX demo worlds. These are available for free via the Minecraft Marketplace (in-game) or NVIDIA’s website. As of 2026, the most notable include:
- RTX Neon District: A cyberpunk cityscape with neon lights, rain effects, and reflective surfaces. It’s a stress test for RTX hardware and a visual showcase for colored emissive lighting.
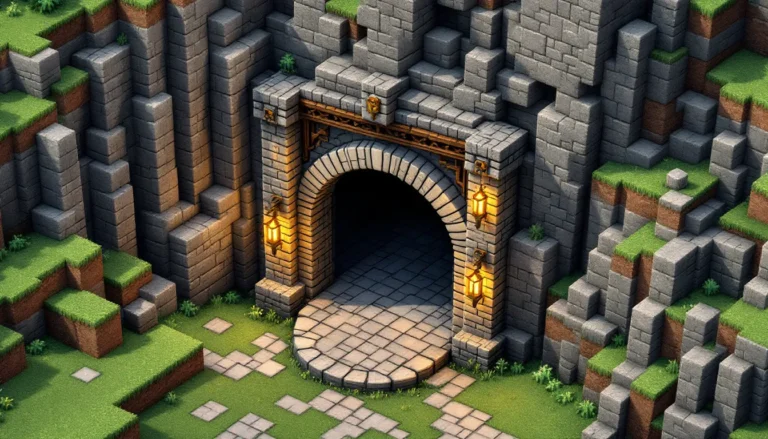
- Of Temples and Totems: An ancient jungle temple filled with puzzles, glowstone patterns, and dramatic lighting contrasts. It demonstrates how RTX transforms dungeon exploration.
- Aquatic Adventure: An underwater world that highlights water transparency, caustics, and refraction. Swimming through kelp forests with volumetric god rays filtering from above is surreal.
- Color, Light, and Shadow: A creative sandbox with pre-built structures and emissive blocks arranged to teach players how RTX lighting works. It’s less a map and more a tutorial.
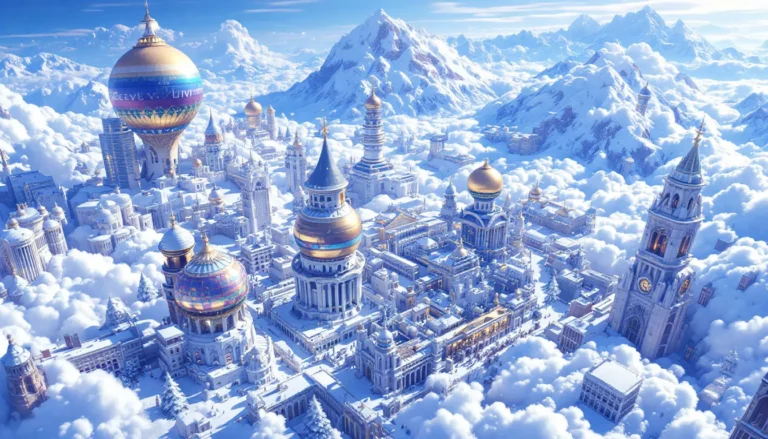
- Crystal Palace: A sprawling ice palace with glass walls, chandeliers, and reflective floors. It’s built to show off reflections and light refraction through transparent materials.
These worlds are optimized for RTX and run better than most community creations. They’re a good starting point before experimenting with custom packs or builds.
Community-Created RTX Resource Packs
Resource packs overhaul Minecraft’s default textures with PBR materials, enabling RTX in any world. Some of the most popular in 2026:
- Kelly’s RTX Resource Pack: One of the earliest and most comprehensive PBR packs. It covers all vanilla blocks with high-quality normal, roughness, and emissive maps. It’s compatible with survival gameplay and regularly updated.
- Vanilla RTX Normals: A subtle PBR pack that stays close to Minecraft’s original art style while adding material depth. Ideal for players who want RTX without drastically changing the game’s aesthetic.
- RTX Realism: A high-fidelity pack with 512×512 textures (overkill for most systems) and aggressive PBR detail. It’s GPU-heavy but visually stunning. Stone looks like real granite: wood has visible grain.
- Illuminations RTX: Focuses on emissive lighting. Adds glow effects to redstone, ores, enchantment tables, and even eyes of ender. Makes caves and nighttime exploration more atmospheric.
- Umsoea’s PBR Pack: A popular choice for builders. Includes additional emissive variants for decoration blocks (glowing bricks, luminous concrete) not found in vanilla.
These packs are typically hosted on community sites and modding platforms where thousands of creators share custom textures and tools. Players interested in experimenting with various Minecraft mods and enhancements often pair RTX packs with other quality-of-life mods to refine their experience.
Installation:
- Download the
.mcpackor.zipfile. - Double-click the
.mcpackto auto-import, or manually place the.zipinC:Users[YourName]AppDataLocalPackagesMicrosoft.MinecraftUWP_8wekyb3d8bbweLocalStategamescom.mojangresource_packs. - Open Minecraft, go to Settings > Global Resources, and activate the pack.
- Load a world and enable ray tracing in Video Settings.
Some packs require experimental features enabled in world settings. If the pack doesn’t appear, check the pack’s readme for additional instructions.
Optimizing Performance for Minecraft RTX
Path tracing is expensive. Even high-end GPUs can struggle at native resolution without optimization. Here’s how to maintain playable frame rates without sacrificing too much visual quality.
Graphics Settings for Better Frame Rates
Minecraft’s Video Settings offer several levers to balance performance and fidelity:
Ray Tracing Render Distance: This is the most impactful setting. It controls how many chunks away from the player are ray traced. Default is 8 chunks: lowering to 6 or even 4 can double FPS in dense worlds. Terrain beyond the RT render distance still appears, but uses standard rasterized lighting.
Upscaling Render Resolution: Lowers the internal resolution before DLSS or upscaling kicks in. Set to 0.75x or 0.5x for significant performance gains at the cost of slight blurriness.
Field of View (FOV): Lower FOV reduces the number of pixels the GPU must render. Dropping from 90° to 70° can improve performance by 10-15%, though it feels more restrictive.
Fancy Leaves and Clouds: Disable these. They add negligible visual impact with RTX enabled but consume GPU resources. Clouds are especially costly with ray tracing active.
V-Sync: Turn off V-Sync and use G-Sync or FreeSync if your monitor supports it. V-Sync locks FPS to your monitor’s refresh rate, which can cause stuttering if performance dips.
Particles: Lower particle count to “Decreased” or “Minimal.” Fire, water splashes, and explosions are less visually important with RTX’s lighting carrying the aesthetic weight.
DLSS Technology and Performance Boosts
DLSS (Deep Learning Super Sampling) is NVIDIA’s AI-powered upscaling tech and a must-have for RTX Minecraft. It renders the game at a lower resolution (e.g., 720p) and uses machine learning to reconstruct a higher-resolution image (e.g., 1080p or 1440p). The result is a massive FPS boost with minimal visual degradation.
As of 2026, Minecraft RTX supports DLSS 3.5, which includes:
- Ray Reconstruction: Replaces traditional denoisers with an AI model trained on high-quality ray traced images. This produces cleaner reflections, sharper shadows, and less noise at lower sample counts.
- Frame Generation (DLSS 3, RTX 40/50-series only): Inserts AI-generated frames between rendered frames, effectively doubling FPS. A game running at 40 FPS can display at 80 FPS with Frame Generation. Note: Input latency increases slightly, so competitive players may prefer to disable this.
DLSS Quality Modes:
- Quality: Renders at ~67% native resolution. Best image quality, modest performance gain (20-30% FPS increase).
- Balanced: Renders at ~58% native resolution. Good compromise (35-45% FPS increase).
- Performance: Renders at ~50% native resolution. Noticeable softness, but major performance boost (50-70% FPS increase).
- Ultra Performance: Renders at ~33% native resolution. Only viable at 4K: image quality degrades significantly at 1080p or 1440p.
For 1080p, Balanced or Quality mode is recommended. For 1440p, Balanced or Performance. For 4K, Performance or Ultra Performance.
Benchmarks show that an RTX 4070 at 1440p with DLSS Balanced averages 65-75 FPS in moderately complex RTX worlds. Without DLSS, the same setup drops to 28-35 FPS. Analysis from hardware reviewers tracking GPU performance across modern games confirms that DLSS is essential for RTX Minecraft playability on anything below an RTX 4080.
Troubleshooting Common Minecraft RTX Issues
Even with compatible hardware and correct settings, RTX can be finicky. Here are solutions to the most common problems.
RTX Not Appearing or Activating
Problem: The Ray Tracing toggle in Video Settings is grayed out or missing.
Solutions:
- Verify GPU compatibility. Open Task Manager > Performance > GPU and confirm your GPU is an RTX 20-series or newer. If you have integrated graphics (Intel UHD), Minecraft may default to that instead. Right-click the Minecraft executable and set it to use the NVIDIA GPU in Windows Graphics Settings.
- Update GPU drivers. Go to NVIDIA’s site or use GeForce Experience. Minecraft RTX requires driver version 551.23 or newer (as of March 2026).
- Ensure you’re using an RTX-compatible world or resource pack. RTX won’t activate in vanilla worlds without a PBR texture pack applied. Download an RTX pack from the Marketplace or a community source.
- Check Windows version. RTX requires Windows 10 (1909+) or Windows 11. Older builds of Windows 10 lack DXR support. Update via Settings > Update & Security.
- Reinstall Minecraft Bedrock. If all else fails, uninstall via Settings > Apps, then reinstall from the Microsoft Store or Xbox App.
Problem: RTX activates but visuals look identical to standard rendering.
Solution: The resource pack likely doesn’t include PBR textures or emissive maps. Try an official NVIDIA RTX world to confirm your hardware and settings work, then troubleshoot the pack.
Performance Drops and Lag Solutions
Problem: FPS is unplayably low (sub-30) even with DLSS enabled.
Solutions:
- Lower Ray Tracing Render Distance to 4-6 chunks. This is the single biggest performance toggle.
- Close background applications. Chrome, Discord, and streaming software consume GPU resources. Close unnecessary programs.
- Reduce texture pack resolution. Some PBR packs use 512x or 1024x textures. Switch to a 128x or 256x pack to reduce VRAM usage.
- Disable DLSS Frame Generation. If you have an RTX 40/50-series card, Frame Generation can sometimes cause stuttering if your base FPS is too low. Turn it off in Video Settings.
- Check thermal throttling. Use MSI Afterburner or HWiNFO to monitor GPU temps. If your card exceeds 83°C, it may throttle. Improve case airflow or adjust fan curves.
- Enable Resizable BAR (ReBAR). This BIOS feature allows the CPU to access the entire GPU VRAM pool, improving performance by 5-10%. Check your motherboard manual for instructions.
Problem: Stuttering or hitching when moving or loading new chunks.
Solution: Install Minecraft on an SSD. RTX worlds load PBR textures and ray tracing data dynamically: HDD seek times cause stuttering. If you’re already on an SSD, increase system RAM allocation. Bedrock Edition doesn’t allow manual RAM allocation like Java, but 16GB system RAM is recommended for smooth chunk loading.
Problem: Crashes or driver timeouts (TDR errors).
Solution: This usually indicates GPU instability. Roll back to a previous driver version if the issue started after an update. Disable any GPU overclocks. If the problem persists, run NVIDIA’s Driver Clean Install option during driver installation to remove corrupted files.
Creating Your Own RTX Content
RTX transforms Minecraft from a game about placing blocks into a game about designing light. Building with RTX in mind requires a different approach than vanilla construction.
Building with RTX Lighting in Mind
In standard Minecraft, lighting is functional: torches prevent mob spawns, glowstone illuminates paths. With RTX, lighting is expressive.
Design principles for RTX builds:
- Use emissive blocks as focal points. Glowstone, sea lanterns, and redstone lamps cast colored light. Embed them in walls, floors, or ceilings to create ambient lighting. A glowstone-lit hallway feels warmer and more inviting than torch-lit stone corridors.
- Layer light sources at different heights. A single ceiling light creates flat illumination. Mix ceiling lights, wall sconces, and floor lamps to add depth and shadow variation.
- Exploit reflections. Build near water or use polished floors to double the visual impact of your lighting. A chandelier reflected in a polished marble floor looks twice as grand.
- Control light color. Redstone lamps emit red: sea lanterns emit cyan. Combine them to create contrast. A red-lit throne room with blue accent lighting in alcoves adds drama.
- Think in 3D, not just 2D. RTX lighting reacts to geometry. Overhangs, arches, and recesses create interesting shadow play. A flat wall with a light source is boring: a textured wall with protrusions and recesses catches light and shadow in dynamic ways.
- Use colored glass as light filters. Place stained glass above or around light sources to tint the emitted light. A yellow glowstone behind red stained glass casts orange light.
Common mistakes:
- Over-lighting spaces. In vanilla Minecraft, you need torches every few blocks. With RTX, fewer light sources create more dramatic, realistic lighting. Let shadows exist.
- Ignoring material contrast. A room built entirely of polished stone feels sterile. Mix rough and smooth materials (wood, stone, carpet) to vary how light interacts with surfaces.
- Forgetting that RTX render distance limits ray traced lighting. If you build a massive structure with lights on one end, players on the other end (beyond RT render distance) won’t see the lighting effects. Design with a 4-8 chunk sphere of influence in mind.
Making Custom PBR Texture Packs
Creating a custom PBR texture pack requires image editing software (Photoshop, GIMP, or Substance Painter) and an understanding of texture mapping.
Steps to create a basic PBR pack:
- Set up your file structure. A Minecraft resource pack is a folder containing subfolders for textures, sounds, and metadata. For RTX, you’ll need a folder structure like this:
MyRTXPack/

├── manifest.json

├── pack_icon.png

└── textures/

└── blocks/

├── stone.png (albedo)

├── stone_mer.png (metallic, emissive, roughness)

└── stone_normal.png (normal map)
-
Create albedo (color) maps. These are the base textures. You can use Minecraft’s default textures or design custom ones. Resolution should be 16×16, 32×32, 64×64, 128×128, or higher (power of 2). Higher resolution = sharper detail but more VRAM usage.
-
Generate normal maps. Normal maps add depth. Use a tool like Substance Designer, GIMP Normal Map Plugin, or online generators. Convert your albedo map into a normal map by detecting edges and converting them to RGB gradients that simulate surface bumps.
-
Create MER maps. MER stands for Metallic (R), Emissive (G), Roughness (B), three grayscale maps packed into one RGB image.
- Red channel (Metallic): White = fully metallic (reflects like a mirror): black = non-metallic (diffuse).
- Green channel (Emissive): White = emits light: black = does not emit.
- Blue channel (Roughness): White = rough/matte: black = smooth/glossy.
Use Photoshop or GIMP to create these channels and merge them into one RGB file.
- Edit the manifest.json. This file tells Minecraft your pack’s name, version, and UUID. Example:
{

"format_version": 2,

"header": {

"name": "My RTX Pack",

"description": "Custom PBR textures",

"uuid": "generate-a-unique-UUID",

"version": [1, 0, 0],

"min_engine_version": [1, 16, 0]

},

"modules": [{

"type": "resources",

"uuid": "another-unique-UUID",

"version": [1, 0, 0]

}]

}
- Test in-game. Zip the folder (or leave unzipped), place it in Minecraft’s
resource_packsfolder, activate it, and enable RTX.
Creating a full PBR pack for all of Minecraft’s 800+ blocks is a massive undertaking. Most creators start with a few blocks (stone, wood, ores) and expand over time. Plenty of community-made packs are available for download through popular modding repositories where creators share texture overhauls and tools.
Conclusion
Minecraft RTX remains one of the most impressive demonstrations of real-time ray tracing in gaming. It’s not just a graphical upgrade, it redefines how light, shadow, and material interact in a game that has spent over a decade with a deliberately simple aesthetic. The transformation is dramatic: torches become warm spheres of falloff-based light, water reflects the sky, and stained glass finally projects colored light onto surfaces below.
Getting it running smoothly takes effort. You need compatible hardware, updated drivers, RTX-enabled worlds or PBR resource packs, and a willingness to tweak settings for acceptable performance. But when it’s dialed in, when you’re exploring an underwater temple with caustics dancing on stone, or standing in a neon-lit cyberpunk city watching rain puddles reflect glowing signs, it justifies the technical hurdles.
Whether you’re a builder designing light-based architecture, a creator making custom PBR packs, or just someone who wants to see Minecraft in a new way, RTX offers a reason to revisit the game. As GPUs improve and DLSS technology advances, the performance cost continues to drop, making ray tracing more accessible to mid-range systems. By 2026, it’s no longer a bleeding-edge feature, it’s a legitimate way to experience Minecraft, provided you meet the hardware requirements and are willing to learn the new rules of light.