Table of Contents
ToggleBuilding a medieval village in Minecraft is one of those projects that starts with “I’ll just throw up a few houses” and ends 40 hours later with a sprawling settlement complete with a market square, defensive walls, and a working farm system. It’s ambitious. It’s time-consuming. And when you finally light up that last lantern at dusk and watch your creation come to life, it’s absolutely worth it.
Whether you’re constructing a small hamlet tucked into a forest biome or an expansive medieval town minecraft complete with districts and guilds, this guide covers everything you need. From layout planning and material selection to advanced building techniques and village population, you’ll learn how to create an authentic medieval village minecraft that feels lived-in and purposeful. No cookie-cutter builds here, just practical strategies, block palette recommendations, and design techniques that work across Java and Bedrock editions (as of 1.21.x in 2026).
Key Takeaways
- A medieval village minecraft project should start with layout planning, including core zones like a town center market, residential district, crafting quarter, agricultural areas, and defensive perimeter to create authentic settlement structure.
- Successful minecraft medieval village builds require mixing materials and textures—combine cobblestone with stone variants, oak with spruce logs, and mix roof materials to create authentic, aged-looking structures that feel lived-in.
- Essential medieval village buildings include a town square with well and market stalls, varied houses (cottages to merchant homes), functional structures like blacksmith and bakery, plus optional defensive walls and watchtowers that dramatically enhance atmosphere.
- Terrain integration and landscaping are critical—use curved dirt paths instead of straight roads, incorporate natural elevation changes, occupy 30-40% of village footprint with farms, and add details like market carts and clotheslines to bring your minecraft medieval village to life.
- Populate your minecraft medieval village with villagers by curing zombie villagers or breeding existing ones, then assign them profession-specific buildings (lectern for librarians, blast furnace for armorers) to create functional trading and community centers.
Why Medieval Villages Are Perfect for Your Minecraft World
Medieval villages hit a sweet spot in Minecraft building. They’re complex enough to showcase your skills but don’t require the pixel-perfect symmetry of modern architecture or the massive resource dumps of castle megabuilds.
The aesthetic works in almost any biome. Toss cobblestone and oak together in a plains biome and you’ve got a classic European village vibe. Use spruce and stone brick in a taiga and suddenly it’s a Nordic settlement. The palette is forgiving and the style is flexible enough to accommodate whatever materials you’ve got stockpiled.
More importantly, medieval villages scale. You can start with three buildings and a dirt path, then expand organically over weeks or months. Add a new house when you’re bored. Throw in a church when you’ve got extra stone brick. Build defensive walls after a particularly annoying creeper incident. Unlike modern cities that demand a complete vision upfront, medieval settlements grow naturally.
They also integrate beautifully with Minecraft’s existing village mechanics. You can populate your custom medieval village with villagers, set up trading halls that actually look period-appropriate, and create iron farms that don’t stick out like a redstone eyesore. The vanilla villager aesthetic already leans medieval, so everything clicks together without visual dissonance.
Planning Your Medieval Village Layout
Choosing the Perfect Location and Biome
Location makes or breaks your village before you place a single block. Flat terrain is tempting but boring, medieval villages worked with the landscape, not against it. Look for areas with gentle elevation changes, natural water features, or interesting rock formations you can incorporate.
Best biomes for medieval villages:
- Plains/Sunflower Plains: Classic choice with easy building and good visibility. Wheat farms look natural here.
- Forest/Dark Forest: Provides wood resources and creates a secluded, atmospheric setting. Great for smaller hamlets.
- Taiga/Snowy Taiga: Nordic aesthetic works perfectly. Spruce logs and stone create that cold-region village vibe.
- River valleys: Natural trade route aesthetic. Build along the water for fishing villages or mill towns.
- Hills/Mountain foothills: Elevation creates visual interest and natural defensive positions.
Avoid swamps (too flat and murky), deserts (wrong aesthetic unless you’re going Mediterranean), and extreme hills (too much terraforming required). You want character, not a construction nightmare.
Proximity to resources matters too. You’ll need forests for wood, stone deposits for cobble and stone brick, and clay for bricks. Having these within a few hundred blocks saves hours of material hauling.
Mapping Out Village Zones and Districts
Medieval towns weren’t randomly scattered, they had logic. The wealthy lived near the center, craftsmen clustered by trade, and farms ringed the outskirts. Replicating this creates believability.
Core layout zones:
- Town center: Market square, well, possibly a church or town hall. This is your focal point. Everything else radiates from here.
- Residential district: Houses of varying sizes. Mix large merchant homes with small worker cottages. Avoid perfect rows, stagger them.
- Crafting quarter: Blacksmith, bakery, fletcher, etc. Group these together. Noise and smoke from forges kept them separate from wealthy homes historically.
- Agricultural zone: Farms, animal pens, barns. Place these on the village perimeter where land is “cheaper.”
- Defensive perimeter: Walls, gates, watchtowers. Optional but adds serious atmosphere.
Sketch your layout in creative mode or on graph paper before committing. Mark where major buildings go, then fill in the gaps. Leave irregular spaces, perfect grids kill the medieval feel. Roads should curve slightly, following terrain contours rather than cutting straight lines.
Essential Buildings Every Medieval Village Needs
The Town Square and Market Center
The town square is your village’s heart. This is where players spawn in, where paths converge, and where the eye naturally goes. Get this right and everything else falls into place.
Essential elements:
- Central well: Use stone brick, cobblestone, or stone walls. Add a wooden frame with a roof. This is both decorative and practical (water source for the village).
- Market stalls: Simple 3×3 or 4×4 structures with overhead canopies. Use fence posts for supports and various wool colors or wood planks for awnings. Place barrels, chests, and item frames to suggest goods.
- Gathering spaces: Leave open areas with hay bales for seating or stone slabs arranged as benches.
- Notice board: Craft a small structure with signs, item frames, and maybe a lectern. Adds story potential.
Size the square proportionally, about 15×15 blocks for small villages, up to 30×30 for larger towns. Use cobblestone or stone brick for the ground, mixing in gravel or path blocks for texture.
Residential Houses and Living Quarters
Housing shows your village’s character. Don’t build ten identical boxes. Vary size, shape, and materials to suggest different wealth levels and occupations.
Small worker’s cottage (5×5 to 6×7):
- Single room with bed, crafting table, furnace
- Cobblestone or stone base, oak or spruce frame
- Simple gable roof with oak or spruce stairs
- 1-2 small windows
Medium family home (7×8 to 9×10):
- 2-3 rooms (main living space, bedroom, small storage)
- Mixed stone and wood framing
- Steeper roof with overhang, maybe a small chimney
- 3-4 windows, wooden door with frame detail
Large merchant house (10×12+):
- Multiple floors (2-3 stories)
- Stone brick first floor, timber framing on upper floors
- Complex roof with dormers or multiple pitches
- Larger windows, balcony or bay window
- Attached shop or storage area
Place 8-15 houses in a small village, 20-40 in a larger settlement. Cluster them with small gaps for gardens or alleys, not in perfect rows.
Functional Buildings: Blacksmith, Bakery, and More
Functional buildings add purpose and break up residential monotony. Each should have distinct visual cues that telegraph its function.
Blacksmith (8×8 to 10×10):
- Open front or large doorway for ventilation
- Stone brick and cobblestone construction (fire resistant)
- Central forge using netherrack, iron bars, and cauldrons
- Anvil, grindstone, smithing table
- Lava or fire source (use glass panes to contain safely)
- Chimney with visible smoke (campfire at the top)
Bakery (7×8):
- Brick or stone oven (use furnaces, smokers, blast furnaces as decoration)
- Wooden display counters with cake, bread, pumpkin pie on item frames
- Large chimney (baking requires heat)
- Flour storage (use barrels or sacks made from white wool)
Church/Chapel (12×15 to 20×30 for larger versions):
- Stone brick or cobblestone construction
- Tall pointed roof, tower or bell spire
- Stained glass windows (use cyan, blue, red, and yellow glass panes)
- Interior altar, pews (stairs or slabs), and lecterns
Inn/Tavern (10×12):
- Two floors minimum (common room below, guest rooms above)
- Bar counter, brewing stands, cauldrons
- Multiple tables and chairs
- Fireplace for ambiance
- Sign outside (use hanging signs in 1.20+)
Other useful structures: fletcher, carpenter, library, guard barracks, stable, mill. Choose 4-8 functional buildings based on your village size.
Best Building Materials and Block Palettes for Medieval Architecture
Stone and Wood Combinations
Medieval buildings mixed materials out of necessity, stone was expensive but durable for foundations, wood was abundant but required fire protection. Replicating this creates instant authenticity.
Primary palette options:
Classic European (most versatile):
- Base/walls: Cobblestone, stone, stone brick
- Frame/accents: Oak logs, oak planks, stripped oak logs
- Fill: Oak planks, white concrete/wool (for plaster look)
- Roof: Oak stairs/slabs, dark oak stairs
Nordic/Mountain:
- Base: Cobblestone, andesite, stone
- Frame: Spruce logs, stripped spruce logs
- Fill: Spruce planks, gray concrete
- Roof: Spruce stairs/slabs, dark oak stairs
Wealthy/Noble buildings:
- Base: Stone brick, polished andesite
- Frame: Dark oak logs
- Fill: Dark oak planks, brick
- Roof: Dark oak stairs, brick stairs
- Accents: Polished granite, prismarine (sparingly)
Texture mixing is critical. Don’t use pure cobblestone walls, mix cobblestone, stone, andesite, and mossy cobblestone at roughly 60/20/10/10 ratios. For wood, combine planks with logs and stripped logs. Add stone buttons, trapdoors, and stairs as texture elements.
Many builders reference community resources and modding guides for texture pack recommendations that enhance medieval builds, though vanilla blocks work perfectly fine.
Roofing Options and Techniques
Roofs make or break medieval buildings. They’re prominent, complex, and immediately noticeable when done wrong.
Best roofing materials ranked:
- Oak/Spruce/Dark Oak stairs: Classic, versatile, abundant
- Brick stairs/slabs: Wealthy buildings, Mediterranean style
- Stone brick stairs: Castle-style roofs, defensive structures
- Deepslate tiles (1.17+): Dark, heavy look for important buildings
- Nether brick: Dark alternative, works for witch houses or darker aesthetics
Avoid: Wool (too bright, wrong texture), concrete (too smooth), wood slabs instead of stairs (wrong angle).
Roof construction techniques:
Standard gable roof (most common):
- Use stair blocks for 45-degree pitch
- Start at building edges, build inward to peak
- Add overhangs (1-2 blocks) on all sides using upside-down stairs
- Mix in slabs for dormers or roof detail
Complex roofs:
- Multiple roof levels for L-shaped or compound buildings
- Dormers: small gabled protrusions for upper-floor windows
- Hips and valleys: where two roof planes meet at angles
- Towers: conical roofs using stair spirals
Texture variation: Mix 90% primary roof material with 10% mossy or cracked variants. Add trapdoors along roof edges for hanging shingle effects. Place stairs at different orientations to create tile patterns.
Step-by-Step Building Techniques for Authentic Medieval Structures
Creating Realistic Walls and Foundations
Medieval buildings had visible construction logic. Stone foundations supported wooden frames, walls showed material transitions, and nothing looked like it spawned from a template.
Foundation layer (always build this first):
- Excavate to ground level or 1 block below
- Create a 2-block tall foundation using cobblestone, stone, or stone brick
- Mix textures: 60% primary stone, 30% variant (andesite/mossy), 10% cracked/detailed
- Extend foundations 1 block beyond wall lines for visual weight
Wall construction:
Timber frame technique (most authentic):
- Build corner posts using full logs (oak/spruce) from foundation to roof height
- Add horizontal logs at mid-height (creates frames)
- Add vertical logs every 3-4 blocks (structural beams)
- Fill between logs with planks, white concrete, or contrasting wood
- Use trapdoors, buttons, or stairs for additional texture on frames
Stone walls:
- Primary material (cobblestone/stone brick) for 70% of wall
- Swap in andesite, mossy variants, cracked stone brick randomly
- Add stone button “rivets” or “mortar” details
- Use full blocks for most surface, mix in stairs/slabs for depth
- Never make walls perfectly flat, add pilasters (jutting columns) every 5-8 blocks
Wall thickness matters: External walls should be 2 blocks thick for large buildings, 1 block for small cottages. Double-thick walls let you add interior depth and make structures feel substantial.
Medieval Window and Door Designs
Windows and doors are jewelry for buildings. Generic holes in walls look lazy. Detailed openings look crafted.
Window techniques:
Small cottage windows:
- 1×1 or 1×2 glass pane opening
- Frame with trapdoors on all sides
- Add shutters using trapdoors or signs on building exterior
- Place flower pots with flowers on window ledge (use slabs to create ledge)
Standard windows:
- 2×2 or 2×3 glass pane opening
- Frame interior with trapdoors or stripped logs
- Exterior frame with stairs/slabs creating a recessed look
- Cross-pattern using iron bars or dark oak trapdoors over glass
Large/wealthy building windows:
- 3×3 or 2×4 glass pane arrangement
- Stone brick or dark oak log frame (2-block border)
- Mullions (dividers) using iron bars, fences, or trapdoors
- Stained glass (blue, cyan, yellow) for churches or noble houses
- Window boxes with flowers below
Door designs:
- Never use bare doors in holes
- Create a 1-block deep recess for doors (adds shadow)
- Frame with contrasting material (stone around wood doors, wood around iron doors)
- Add an arch using stairs/slabs above door
- Place slab “step” in front of door
- Overhang (small roof) above entrance using stairs
Adding Details: Chimneys, Beams, and Texturing
Chimneys (essential for realism):
- Interior: Place furnace, smoker, or campfire at ground level
- Structure: Build cobblestone or stone brick column from fireplace to above roofline (2×2 or 1×1)
- Roof penetration: Chimney should exit roof near peak, not at edges
- Top detail: Add stone brick stairs as chimney cap, place campfire at top for smoke effect
- Interior smoke: Use cobweb or gray carpet inside chimney shaft (optional)
Exposed beams (exterior timber framing):
- Place stripped logs or regular logs on building exteriors in cross-patterns
- Diagonal beams: use logs with stairs/slabs filling gaps to create angled appearance
- Horizontal bands at foundation line, mid-wall, and roofline
- Vertical posts at corners and every 3-4 blocks
Texturing techniques:
- Wall depth: Use stairs, slabs, and buttons to create 3D surface variation
- Stone walls: Place upside-down stairs randomly for “damaged” stone look
- Wooden walls: Alternate plank directions, mix in trapdoors and fences
- Aging effects: Add mossy stone variants, cobwebs in corners, vines on north-facing walls
- Support structures: Add wooden fence “support beams” under overhangs or balconies
These techniques appear in many detailed build guides covering advanced Minecraft construction methods, though hands-on practice beats reading about them.
Landscaping and Terrain Features for Medieval Villages
Pathways, Roads, and Village Connections
Medieval roads were dirt, worn smooth by foot traffic and cart wheels. They curved around obstacles and followed easy grades. Straight modern roads kill the vibe instantly.
Road construction:
Main roads (3-5 blocks wide):
- Primary material: Dirt path blocks (use shovel on grass/dirt)
- Mix in: Coarse dirt (20%), gravel (10%)
- Edge definition: Stone slabs, cobblestone, or wooden fences along edges
- Add ruts: 1-block-deep trenches down center filled with gravel (from cart wheels)
Secondary paths (2-3 blocks wide):
- Dirt path blocks with more gravel mixed in
- Less defined edges
- Can be rougher and more organic
Alleyways and footpaths (1-2 blocks wide):
- Dirt path or just flattened grass
- Stone slabs or cobblestone near building entrances (to prevent mud)
Road layout principles:
- Connect town square to all major buildings
- Curve roads slightly, avoid 90-degree turns when possible
- Roads should narrow in residential areas, widen near markets
- Add crossroads with small open spaces (medieval intersections weren’t tight)
- Include drainage ditches (1-block trenches) along roads in wet biomes
Bridges: If roads cross streams, build simple stone arch bridges (5-9 blocks wide, cobblestone/stone brick construction with arch using stairs).
Farms, Gardens, and Agricultural Areas
Medieval villages were agricultural first, residential second. Farms should occupy 30-40% of your village footprint.
Field types:
Crop fields:
- Rectangular plots (8×8 to 12×16 typical)
- Separate fields with dirt paths or fence lines
- Mix wheat, carrots, potatoes, beetroot (don’t make it all wheat)
- Vary plant growth stages for realism (bone meal some areas, leave others growing)
- Add scarecrow: fence post with carved pumpkin, hay bale body, leather armor
Orchards:
- Oak or birch saplings grown to full trees in rows
- 4-5 block spacing between trees
- Grass or path blocks between rows
- Good for village outskirts or wealthy estates
Gardens (near houses):
- Small 3×3 to 5×5 plots
- Mix flowers, crops, composters, and bee hives
- Fence borders using oak or spruce fences
- Paths made from stone slabs or dirt path
Animal pens:
- Fenced areas (oak or spruce fence, 8×8 to 12×12)
- Separate pens for cows, sheep, pigs, chickens
- Include feeding troughs (use cauldrons, barrels, or composters)
- Add small shelter structure (3×3 roof on posts)
- Place hay bales for animal feed
Agricultural buildings:
- Barn: 10×12 structure with double-height ceiling, hay bale storage, animal stalls
- Silo: Cylindrical stone structure (6-8 block diameter) for grain storage
- Windmill: Advanced build, 8×8 base, tower structure with rotating blade frame
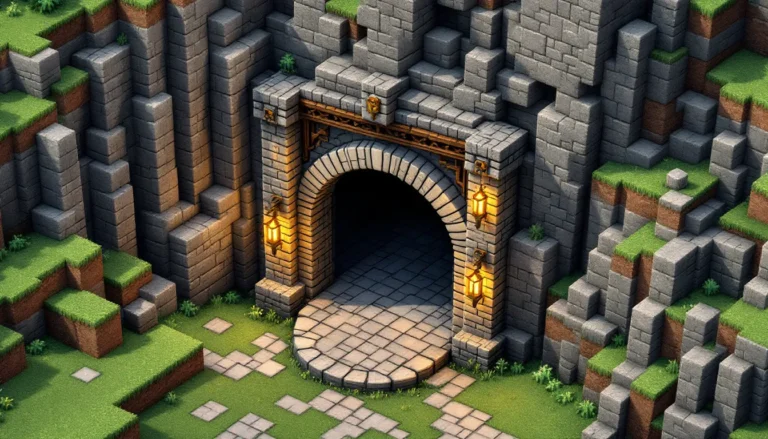
Defensive Structures: Walls, Gates, and Watchtowers
Not every village needs walls, but adding them transforms a settlement into a fortified town. They provide security, define boundaries, and look impressive from any angle.
Village wall construction:
Basic walls:
- Height: 5-8 blocks tall (includes 3-block solid base, 2-block parapet)
- Thickness: 2-3 blocks (thicker looks more defensive)
- Material: Cobblestone base, stone brick upper sections, mix in cracked/mossy variants
- Crenellations: Use wall blocks (stone walls) along top for classic medieval parapet look
Wall path:
- Add walkway along interior of wall (2 blocks wide, 1 block below wall top)
- Use stone slabs or stone brick for walking surface
- Stairs at regular intervals for access
Wall construction steps:
- Mark wall perimeter around village (leave space for expansion)
- Clear terrain along wall line
- Build foundation trench (1 block deep) filled with stone
- Construct wall base (3 blocks tall, solid)
- Add parapet section (2 blocks with wall blocks on top)
- Build interior walkway and stairs
Gates:
Main gate (town entrance):
- Width: 5-7 blocks for main gate, 3-4 for side gates
- Height: 6-8 blocks (creates imposing entrance)
- Construct gate towers on each side (6×6 base, rise 10-12 blocks)
- Gate door options: Iron doors, oak fence gates (double), or no door with just arch
- Add portcullis effect using iron bars or dark oak fence gates
- Gate arch: Use stone brick stairs to create curved arch over entrance
- Defensive features: Murder holes (gaps in gate ceiling), arrow slits in towers
Gate details:
- Stone brick and cobblestone primary materials
- Add banners to gate towers (custom designs or solid colors)
- Lighting: torches, lanterns, or soul lanterns on gate structures
- Connect gate seamlessly to walls on both sides
Watchtowers:
Place towers every 20-30 blocks along walls, at corners, and flanking gates.
Tower construction:
- Base: 5×5 or 6×6 cobblestone/stone brick
- Height: 12-18 blocks (should rise 6-10 blocks above wall height)
- Interior: Ladders or spiral staircase for access
- Top platform: Open area with wall blocks as crenellations
- Roof: Conical roof using stairs, or flat with defensive parapet
- Arrow slits: 1-block holes with trapdoors or iron bars
Optional defensive features:
- Moat: 4-5 blocks wide, 3 blocks deep, water-filled trench around walls
- Drawbridge: Use pistons and redstone to create functional raising bridge
- Corner bastions: Large tower structures at wall corners (8×8 base)
- Killing fields: Clear vegetation for 15-20 blocks outside walls (clear sight lines)
Bringing Your Village to Life with Details and Decorations
Interior Design for Medieval Buildings
Interiors separate decent builds from impressive ones. Nobody sees them in screenshots, but exploring a fully furnished village feels completely different from walking through hollow shells.
Essential furniture and fixtures:
Living areas:
- Beds (obviously) with wool carpet “rugs” beside them
- Tables: Use fence posts with pressure plates or trapdoors on top, or wooden slabs
- Chairs: Stairs or slabs positioned as seats
- Fireplace: Stone brick surround, netherrack or campfire, chimney connection
- Storage: Chests, barrels (more period-appropriate), item frames showing contents
- Lighting: Wall-mounted torches, lanterns on chains, candles on tables
Kitchens:
- Cooking area: Smokers, furnaces, campfires
- Counters: Smooth stone slabs, wood slabs, or upside-down stairs
- Storage: Barrels for flour/grain, chests, item frames with food items
- Cauldron: For water/washing
- Hanging herbs: Use vines or green carpet on ceiling with item frames
Workshops:
- Trade-specific blocks: Anvils for blacksmith, looms for weaver, brewing stands for apothecary
- Workbenches: Crafting tables, stonecutters, grindstones
- Material storage: Appropriate to trade (iron blocks for blacksmith, hay bales for farmer)
- Tools: Item frames with appropriate tools displayed
Churches/public buildings:
- Pews: Stair blocks in rows
- Altar: Elevated platform with lectern and candles
- Stained glass windows casting colored light
- Banners on walls
- Lecterns with written books (signs or actual books)
Key interior design principles:
- Leave space to move, don’t pack every block
- Use carpet for floor decoration and color
- Vary ceiling height (add exposed beams)
- Light naturally (windows) and with placed light sources
- Add clutter (flower pots, item frames, armor stands)
Outdoor Decorations and Environmental Storytelling
Street-level details:
Market and commerce:
- Barrels and crates stacked near storage buildings
- Carts: Use fence/wall pieces as frame, trapdoors as sides, tripwire hooks as handles
- Hanging signs (use 1.20+ hanging signs or create with fences and regular signs)
- Item frames on market stalls showing goods
- Wool awnings over doorways
Everyday life:
- Clotheslines: Fence line between buildings with banners or carpet hanging
- Wells scattered through village (1-2 per district)
- Haystacks: Hay bale piles with scattered individual bales
- Wood piles: Stack oak logs near houses
- Tool sheds: Small 3×3 structures with exposed storage
Nature integration:
- Flowers in pots near doorways
- Vines growing on older buildings (north sides look best)
- Trees: Leave some natural trees, add planted ones in squares
- Grass variety: Use tall grass, flowers, ferns for unmaintained areas
- Animals: Cats, dogs, horses tied to posts
Lighting:
- Torches on building walls (near doors especially)
- Lanterns hanging from fence posts or chains
- Street lamps: Fence posts with lanterns on top, every 8-12 blocks along roads
- Candles in windows (visible from outside at night)
Environmental storytelling elements:
- Abandoned cart with broken wheel
- Small graveyard outside village (stone slab headstones)
- Notice board with “wanted” posters (use item frames and maps or signs)
- Blacksmith with cooling trough and anvil outside
- Butcher with hanging meat (use item frames or tripwire hooks)
- Fisher’s hut near water with nets (cobweb), barrels, fishing rods in item frames
Populating Your Village with Villagers and NPCs
Empty villages are ghost towns. Population makes your creation functional and alive.
Getting villagers:
- Cure zombie villagers: Find zombie villagers in your world, cure using weakness potion + golden apple
- Transport from existing village: Use boats or minecarts to move villagers (tedious but reliable)
- Breeding: Once you have 2 villagers, provide beds and food (bread, carrots, potatoes)
Villager management:
- Beds: 1 bed per villager. Place beds indoors in appropriate houses.
- Job blocks: Place workstations to assign professions (lectern = librarian, blast furnace = armorer, etc.)
- Profession matching: Put blacksmith villagers in the smithy, farmers near fields, clerics in the church
- Trading halls: Build dedicated area if you want efficient trading (separate from village aesthetic)
Job block placement for themed buildings:
- Blacksmith: Anvil, blast furnace, grindstone
- Library: Lecterns
- Church: Brewing stands (cleric)
- Farmer’s house: Composter
- Fletcher: Fletching table
- Mason: Stonecutter
Population distribution:
- Small village (5-10 buildings): 8-15 villagers
- Medium village (15-25 buildings): 20-40 villagers
- Large town (30+ buildings): 50+ villagers
Don’t overpopulate. Too many villagers cause lag and overcrowding. Target 1-2 villagers per 2-3 houses. You can reference meta analysis guides for optimal villager trading setups if you’re balancing aesthetics with efficiency.
Protecting villagers:
- Light everything (mobs won’t spawn above light level 7 in 1.18+)
- Build walls and gates
- Add iron golems (16 villagers + 21 beds spawns golems naturally, or craft them)
- Use cats (scare creepers) by letting villagers breed them
Advanced Tips and Creative Ideas for Unique Villages
Themed district variations:
Instead of one unified style, create districts with different characters:
- Old town: Older, more weathered buildings with vines, cracked stone, and mossy blocks
- Wealthy quarter: Larger homes, stone brick instead of cobblestone, decorative gardens
- Industrial area: Warehouses, larger workshops, more utilitarian design
- Harbor district: If near water, add docks, fishing boats, lighthouse, warehouses
Terrain integration techniques:
- Hillside villages: Build into slopes with terraced houses at different elevations. Use stone retaining walls.
- Underground expansion: Create cellars, storage crypts, or mine entrances beneath buildings
- Water features: Build over streams using bridges, add waterwheels for mills, create artificial ponds
- Rock formations: Incorporate natural stone outcrops into builds, build around them rather than removing them
Cultural variations:
Alpine/Mountain village:
- Heavy use of spruce, stone, and cobblestone
- Steeper roofs (to shed snow)
- Stone foundations with timber upper floors
- Smaller windows
Mediterranean/Southern:
- White concrete or quartz mixed with oak
- Terracotta and brick accents
- Flatter roofs
- Open courtyards
- Lots of plants and flowers
Trading post/frontier settlement:
- More utilitarian, less decoration
- Palisade walls (oak fence) instead of stone
- Larger storage buildings
- Stable and inn prominent
Abandoned/ruined village variation:
- Remove roofs from some buildings
- Add cobwebs, vines, moss heavily
- Create collapsed walls using stairs and slabs
- Overgrown farms
- Missing doors and windows
- Creates atmospheric exploration builds
Multi-elevation building:
Don’t build everything at ground level. Create visual interest with elevation:
- Build houses stepping up hillsides
- Create basements that open to lower ground on one side
- Add second-story walkways between buildings
- Build watchtowers that overlook the village
Seasonal decoration:
Plan your village so you can add seasonal variations:
- Winter: Add snow layers, ice in fountains, remove flowers
- Harvest: Add pumpkins, haybales, harvest carts
- Festival: Add colored banners, market stalls, decorative lighting
Hidden details and secrets:
- Secret passages between buildings
- Hidden basement chambers or storage
- Sewer system beneath streets
- Secret escape tunnels through walls
- Hidden treasure rooms with loot
Expansion planning:
Leave space for growth:
- Mark expansion zones with paths or fences
- Build outer walls larger than current village needs
- Leave plots “under construction” with foundations only
- Create road network that extends beyond current buildings
Building in survival vs. creative:
Survival builds require different planning:
- Start small (3-5 core buildings)
- Gather materials in bulk before starting large projects
- Build functional structures first (storage, farms, villager breeding)
- Add decoration over time
- Use villager trades to acquire rare blocks (glass, bricks)
- Build resource farms early (cobblestone generator, tree farm)
Performance considerations:
Large villages can cause lag:
- Limit villager count (50-60 max for smooth performance)
- Reduce entities (too many item frames, armor stands)
- Use simpler lighting (torches/lanterns instead of redstone lamps)
- Avoid massive redstone contraptions in village core
- On servers, build villages in chunks that aren’t always loaded
Conclusion
Building a medieval village minecraft isn’t a weekend project, it’s an ongoing world-building exercise that evolves the more you add. Start with core structures, establish your material palette and building style, then expand organically. The best medieval town minecraft builds feel lived-in because they grew naturally, not because someone executed a perfect master plan on day one.
Focus on variation and authenticity. Mix building sizes, vary your block palette, add weathering and texture. Let roads curve, leave spaces irregular, and integrate the terrain rather than flattening everything. Details sell the illusion, chimneys with smoke, market carts, hanging laundry, worn pathways.
Whether you’re building in survival or creative, on Java or Bedrock (all techniques here work across versions 1.18-1.21+), the principles remain the same. Plan your layout, build your essential structures, texture everything thoughtfully, and populate with life. The result is a village that feels purposeful, atmospheric, and worth returning to, whether you’re showing it off to friends or just enjoying the view while your villagers go about their business.